Posts on theantiquedjourney.com may contain affiliate links. As an Amazon Associate, I earn on qualifying purchases. You can read the full privacy policy and disclosures here.
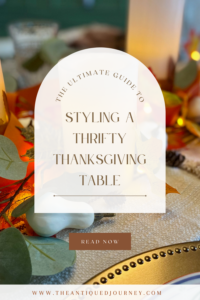
A Grateful Gathering: Creating a Thrifty Thanksgiving Tablescape
By Rachel
|
Share this post. Share the Journey!
Last Updated on September 18, 2025 by Rachel
Learn the art of creating a thrifty Thanksgiving tablescape for under $40!
The table is the heart of any Thanksgiving celebration—the place where we gather, share a meal, and give thanks with our favorite people. While the idea of a beautifully set table can feel overwhelming and expensive, it doesn’t have to be. This year, let’s skip the big box stores and embrace the thrill of the hunt! In this post, I’ll show you how to create a stunning and personal thrifty Thanksgiving tablescape using unique, thrifted finds that are both budget-friendly and full of character.

Style a Unique Thanksgiving Table with Thrift Store Finds
Creating a beautiful Thanksgiving table for your friends and family to enjoy doesn’t need to cost hundreds of dollars and I’m here to show you how! Join me as I walk you through this simple and affordable process.
Thrifted Thanksgiving Tablescape: Gratitude on a Budget
I’m joined today by my friend Donna from the blog An Organized Season. Donna has created many beautiful tablescapes in the past. Her creativity and talent is incredible. I asked her to join me on this post so you could pull inspiration from her as well!
Head over to her post, My Best Ideas For A Thrifted Thanksgiving Table, to learn her helpful (and pretty) decorating tips!

Thrifted Gems: Dishes, Linens, and Accents for a Budget-Friendly Banquet
If you have been around for any length of time, you know my love of thrifting. I just can’t get enough of it! You can find so many amazing home decor and vintage items for your home for mere dollars.
The tablescape that I’m sharing with you today is made up of items that came from the thrift store or dollar store as well as things that I already had at home.
Tips for a Stylish Thanksgiving Table
Like I do before I create any type of vignette or tablescape in my home, I take a minute and think about what I want to convey to others.
I ask myself questions like:
- “How do I want this table to feel?” or
- “What colors would work well with that specific feeling?”
For me, decorating is an art and I’m always trying to tell a story through the pieces I choose to use.

Thanksgiving Table Centerpiece Decor Items
- vintage tablecloth
- cream and brown placemats
- Rust colored velvet ribbon
- pre-lit leaf garland
- faux eucalyptus stems
- faux pillar candles
- mini white pumpkins

Thanksgiving Place Settings Decor Items
- Brass-colored chargers
- Dinner plates
- Salad plates
- Drinking glasses
- Cloth napkins
- Brass napkin rings
- Flatware
A Grateful Gathering: Creating a Thrifty Thanksgiving Tablescape
To make this whole process seem achievable, I’m breaking this post down into two sections. I’ll cover the centerpiece portion first then move on to the place settings. Here we go!
A Warm and Welcoming Centerpiece
The first thing you want to do is clear everything off the table that you are using for Thanksgiving. I took this time to give everything a good cleaning by wiping down the top of my table as well as my chairs.
After that, I went into my linen drawer to choose a tablecloth. Out of all the pretty linens that I’ve collected over the years, this one ended up winning for the Thanksgiving table.

Next, I started to create the centerpiece. But, I needed to know how far down I could go and how wide I could make it without interfering with each person’s place setting.
So, I opted to put the chargers down first as a guide for that.
See? Much easier! Now I know my centerpiece boundaries.

As you can see above, I initially placed the leaf garland right on top of the tablecloth. However, I didn’t feel anchored enough to me…I felt like the garland was just floating randomly.
So, I went back to my linen drawer and rummaged around to see what I could use to fix it. I didn’t have any table runners that worked, so I opted for some matching placemats.

Do you see how, by using those as a base layer for the centerpiece itself, it creates a more cohesive look?
Now I can create the rest of the centerpiece on a much more grounded area without it all feeling so random.

I was at the dollar store a few weeks ago looking for ribbon and I walked past this pre-lit leaf garland. It really caught my eye and I knew instantly that it would look so pretty as a part of this centerpiece.

I put the batteries in, turned it on, and folded it in half. Then, I placed it right in the center of the placemats.

Then, it was time for greenery. I’m really loving olive and sage green shades for fall this year. Lucky for me, I felt like those colors would work beautifully for this tablescape.
To me, those shades of green convey a calm feeling and would help tone down the brass elements, making the whole table feel a little softer.

I had this faux eucalyptus branch in my stash. This branch has the most realistic looking eucalyptus leaves I think I’ve ever seen!
To use it for my centerpiece, I snipped off large sections of it from the long branch using floral cutters.

Then, I simply placed each section of stem along the base of the placemats. I fluffed the stems and moved them around until I was happy with how they looked.
By incorporating greenery, whether it is faux or real, brings in texture, color, and depth.

The next step was to place five faux pillar candles. While I do love real candlelight, it just made more sense to use faux for this table.
I added three leaf candles first.

Then, I placed two more plain white pillar candles to complete the candle portion. There is just something so re-assuring and calming about candlelight that I simply love. 
Next up is the ribbon. I found this amazing rust colored velvet ribbon for $3.00 at the dollar store. I thought it would make a bold statement in this Thanksgiving centerpiece.

All I did was simply weave it in and out of the candles. I made sure the ribbon was consistent on all sides of the centerpiece because people would be seeing it from all angles.
Then, once it reached the other side, I cut the ribbon at an angle and tucked the tag end under the branches.

The last step for this Thanksgiving centerpiece is to disperse miniature faux white pumpkins and pinecones.

By adding in these faux pumpkins, it gave me that natural element that I wanted without worrying about them rotting. The white color of these pumpkins and gourds pairs wonderfully with the other white and cream hues that I have going on throughout the table.
They also add another layer of texture and, for me, really helped to tie everything together.

I’m in love with how this Thanksgiving centerpiece turned out. Everything feels balanced and ‘just so’. The glow of the candles and the little lights in the garland add a magical feeling to this display, almost like its part of a fairy forest.
Now let’s move on to the next section of this post!
A Grateful Gathering: Creating a Thrifty Thanksgiving Tablescape
Vintage Flair with Thrifted Place Settings
This part of the tablescape is super simple, basically just adding dishes, napkins and drink ware.
Before I go any further, I will say that I’ve been looking for vintage ironstone dishes to use on my Thanksgiving table for over a month how. I have been perusing thrift stores and online sources trying to find some that I both love and are affordable but haven’t found any.
So, my only option is to use my everyday dishes. Don’t get me wrong…I adore these dishes. They are vintage, given to me by my mother-in-law years ago. I was just hoping for something without red edges and flowers. But, I’m out of time. I’ll keep looking and maybe have a whole set of ironstone dishes for next year!

I added a dinner plate and salad plate on top of each charger. After I had placed the plates against the brass, I actually thought it looked pretty neat! My expectations were not high as to how well these were going to match the table. I was pleasantly surprised and felt much better about it now!
Then, I placed these vintage-inspired drinking glasses at each spot.

The last item I added were cloth napkins. I have many cloth napkins in my linen drawer so I just went through and chose coordinating ones. The best part about cloth napkins is that I can use my thrifted napkin rings with them!
I couldn’t believe my eyes when I found this whole bag of brass napkin rings for just .99 cents! Isn’t that maple leaf just SO perfect?!

They really help round out this whole table setting and add that perfect hint of harvest to each person’s seat.

Creating a Memorable Gathering with Thrifted Finds
So, after all that, here is what the finished thrifted thanksgiving tablescape looks like!
My husband is a designer and when he’s designing a website he always says ‘it’s going to look not pretty until it doesn’t.’ That was the case for my table for awhile but I tried really hard to not let perfection get the best of me.
I worked with what I had and ended up creating a table that I’m proud of! It’s simple yet elegant and will be the quintessential background for our Thanksgiving this year.

Closing Tidbits on A Grateful Gathering: Creating a Thrifty Thanksgiving Tablescape
Being able to create a pleasing thrifted thanksgiving tablescape for your guests is a privilege but you sincerely don’t need to spend hundreds of dollars to achieve that. It’s taken me years of practice to be able to understand how to best thrift items and decor for my home that are purposeful, unique and a fair price.
My goal is that these tips and ideas that I’ve shared today are helpful for you, at least giving you a baseline for how to get started thrifting a Thanksgiving table.
I urge you to give it a try, finding joy and thankfulness along the way.

Once again, thanks to Donna for joining me on this post today. Be sure to head over to her Thanksgiving table post and say hello! Leave us a comment and let us know if you have any other ideas or special traditions.

Just click the red button in the left corner!
If you are new here, I’m Rachel, the writer and content creator here at The Antiqued Journey. I’m so happy to have you! I encourage you to stop by the ‘about me’ page to get to know me a little more.
Here on the blog, you will find loads of inspiration for decorating with vintage and antique decor, simple DIY crafts and many thrifting adventures. If that interests you, I invite you to sign up for my e-mail. You will receive a free digital download as a thank you!
Follow Along with The Antiqued Journey
- The Antiqued Journey shop
- Browse curated content in my LTK shop
Shop Thanksgiving Table Decor Essentials

Other Posts to Enjoy


Feeling a little unsure where to start with vintage decor?
I created Found and Favored, a beginner-friendly guide that walks you through what to look for, how to spot quality pieces, and how to style vintage finds with confidence — without overspending or feeling overwhelmed.

Hey! I’m Rachel!
I’m so glad you are here! Old things are my jam. Antique malls and thrift stores are my happy places.
Here on the blog I love to share my excitement, knowledge, and ideas about all things antique, vintage, and thrifted. Let’s journey together!
Want to style vintage decor with confidence?
Get the beginner’s guide that will save you money and help you find real treasures.

Sign me up for the
Journey!
Sign up for free antique and vintage inspiration, DIY projects, and thrifting tips straight to your inbox.
35 Comments. Leave new
This Thanksgiving tablescape feels so warm and inviting, Rachel! I love all the thrifted finds you incorporated and how added the vintage tablecloth too. It’s so pretty. Hugs, CoCo
Hello!!
Thanks so much, CoCo!!! This was so fun to put together and I’m so glad you enjoy it! Hope you are safe from the weather there in Florida!
It’s all so beautiful Rachel! You did a fabulous job with your thrifting, and your table is so welcoming. Thanks for all the tips and the reassurance that you don’t have to spend a lot. Happy Thanksgiving!
Hi!!
Thanks so much!! I had so much fun with this one and I’m so glad you enjoyed it!!
Hi Rachel! This looks beautiful! I’d love to invite you to come link up at my weekly link party every Wednesday! https://www.ourtinynest.com/2022/11/09/weekly-wednesday-link-party-321/
Hi Nicolle!
Thanks so much! I will check it out!
Hi Rachel! This tablescape looks so warm and inviting. You did a great job putting this together for such a good price. Thanks for the inspiration!
Thanks very much, Anna!! It was so much fun to put together!
Rachel, your table looks wonderful! The vintage tablecloth is lovely, and the leaf garland and candles add such a warm glow to the tablescape! I can not believe you got those napkin holders for only 99 cents! You always find such great items! Thanks for all the fabulous tips! This was so fun, it was great working with you! Hope you and yours have a Happy Thanksgiving! Blessings, Donna
Thanks so much, Donna!!
Those napkin rings were truly such a score! I had so much fun with this one…thanks so much for joining me!!
Happy Thanksgiving to you and your family!
[…] Thrifted Thanksgiving Table Thrifted Goodies Volume […]
Your table scape is so warm and pretty Rachel! I love to thrift too, ok I am obsessed lol so glad to have found your blog 🙂 Tanya
Hi!!
Thank you so much!! I’m so happy to have you here!!
Hi Rachel! I love your thrifted Thanksgiving table scape. I actually have a set of the leaf lights that I purchased at my local Dollar Tree, and I just adore them. I didn’t think to use them in my table scape design. Thank you so much for that idea. Everything looks so lovely. Thank you for sharing your beautiful table scape with us.
-Steph
Hello!
Thank you!!! I appreciate you stopping by today and for your lovely comment!!
[…] Thanksgiving tablescape Please click HERE to see more of this Thanksgiving Tablescape Please click HERE to see the Thanksgiving Tablescape Please click HERE to see more of the thanksgiving […]
Rachel, this table looks so inviting! I love all the warm colors you used. Those light up leaves are perfect way to give your table a natural glow. And the cost of this table can not be beat! Have a good weekend my friend- Meagan
Thanks, Meagan!! This one was really fun to put together. Happy Thanksgiving to you and your family!!
The cozy ambiance and glow of your table is so warm and inviting, Rachel. It’s perfect to welcome family and friends for a Thanksgiving feast. And I love the pretty texture of the lace tablecloth too. So gorgeous!
Thanks so much, Jen!! I appreciate your kind words! This was so much fun to put together and am excited to be able to use it on Thursday!
[…] Thrifted Thanksgiving Tablescape […]
I love this Rachel! You combined two of my loves, thrifting and setting a pretty table. This all looks so pretty and thanks for sharing so many great ideas! XO- MaryJo
Hi!
Thank you!!
[…] thrifted crate is what jumpstarted my Thanksgiving centerpiece idea and I ran with it. This approach will bring a unique and rustic charm to any […]
[…] Thrifted Thanksgiving Tablescape […]
[…] for plain white dishes at the thrift store for many months because I want to be able to expand my tablescape repertoire here on the blog. And, after so long, I finally found them! I purchased 6 dinner plates and 6 salad […]
[…] not least are linens! Pretty textiles are some of my very favorite things to decorate and use for tablescapes because they add such softness to a […]
[…] Next, I placed four chargers around the table. These are the same ones I used for my Thanksgiving tablescape. […]
[…] thrifted crate is what jumpstarted my Thanksgiving centerpiece idea and I ran with it. This approach will bring a unique and rustic charm to any […]
[…] Next, I placed four chargers around the table. These are the same ones I used for my Thanksgiving tablescape. […]
[…] Thanksgiving Table Styling […]
[…] Thrifty Thanksgiving Table Decor […]
[…] The handmade leaf napkins add such a whimsical touch to the table. How perfect to use for a fall party or Thanksgiving! […]
[…] my home, I tend to roll fall and Thanksgiving decor into one because, well, I just don’t have enough time in my life to re-decorate. But, I […]
[…] if you are a planner like me and looking for Thanksgiving table decor ideas, this post has my best budget friendly […]