Last Updated on October 22, 2024 by Rachel
I want to share with you 4 thrifty Thanksgiving place setting ideas to make your guests feel extra special!
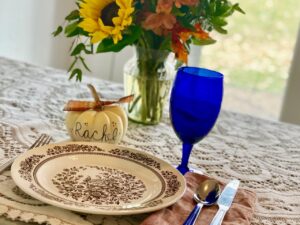
Thanksgiving is a special time to reflect on what it means to be grateful. It’s a time of gathering and fellowship and focusing on all that is good. If you are looking for some simple and budget friendly place settings for your Thanksgiving table, follow along as I show to 4 thrifty Thanksgiving place setting ideas and the materials needed for each. I hope these bring you some inspiration!

4 Thrifty Thanksgiving Place Setting Ideas
All of the ideas I’m sharing here today are things that can be found at either a thrift store or dollar store. You can totally create cute place settings for your guests to enjoy on a budget. Let’s get into it!
Place Setting Idea #1- White Pumpkins
Materials Needed
- one small white pumpkin for each guest
- a dark colored Sharpie
- fall ribbon
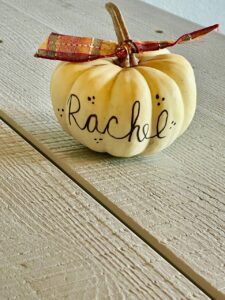
The first idea is to use small white pumpkins. I picked up a handful of these pumpkins about a month ago for $1 each to use in my outdoor fall display. This is a great way to use them before they turn rotten!
Here are the steps for using a white pumpkin to create a place setting.
- Use a damp paper towel to wash off the outside to remove any dirt.
- Write each person’s name using either a Sharpie or a paint pen. Try and write the names a little higher up than the middle of the pumpkin. If you write the name too low it might be difficult to see once it is set on the table.

- Tie a fall ribbon around the stem. You could use a pattern, such as plaid, or try a neutral such as a creamy white.
- Place one pumpkin at each guest’s table spot for a festive feel!
Place Setting Idea #2- Wooden Spoons
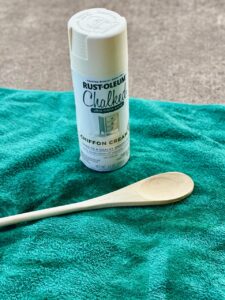
Materials Needed
- one wooden spoon for each guest
- a dark colored Sharpie or paint pen
- fall ribbon
- white spray paint (optional)
The second place setting idea is to use wooden spoons! This is a unique and inexpensive way to create place settings for each guest. I actually found these two spoons at the thrift store for .79 cents each! For a thrifty budget, check your local dollar store or thrift store for wooden spoons.
Here are the steps needed to create them.
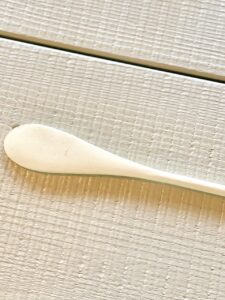
- Use a damp rag to clean off each spoon. Let them dry completely.
- You can now either choose to keep them raw wood tone or spray paint them.
If you would like to paint them, you will need an old towel or something to put under the spoons. Lightly spray each spoon with white paint and let them dry. Continue this process until you have the desired coverage of paint.
- Then, write each guest’s name on the spoon. For ease, I flipped the spoon over and wrote on the flat side. Tip:If you are limited on space at your table, you can cut the spoons down to a shorter length using a hand saw.
- Tie on a fall ribbon and you have a cute place setting!


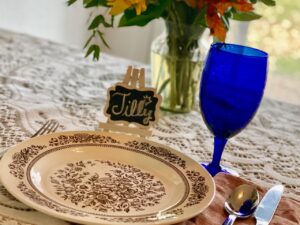
Place Setting Idea #3- Miniature Chalkboards
Materials Needed
- one miniature chalkboard and stand for each guest
- chalk
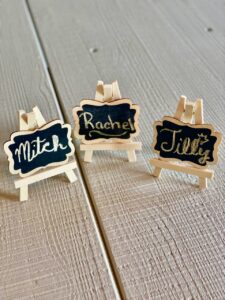
This idea is super simple. You can find these little chalkboards with stands at the dollar store or on Amazon. They come in packs so order enough for each guest.
All you need to do is write each guest’s name on the chalkboard and use the stand to set it at each table spot.
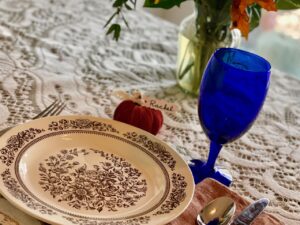
Place Setting Idea #4- Faux Pumpkins
Materials Needed
- one faux pumpkin for each guest
- white card stock
- fall ribbon
- fancy craft scissors
- black Sharpie
- hole punch
You can find inexpensive faux pumpkins at any craft supply store, on Amazon, or Target. The ribbon that I used for this idea is actually from the dollar store. You can create beautiful things on a thrifty budget!
Below are the steps to complete this place setting idea.
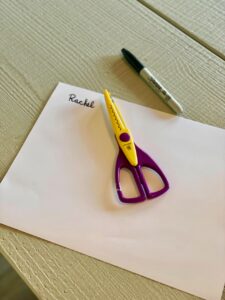
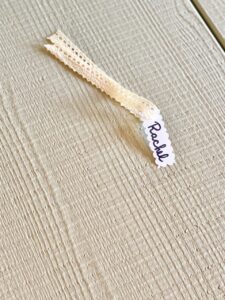
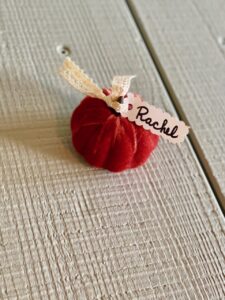
- Write each guest’s name on white card stock using a Sharpie marker. When you do this, leave enough margins on each side of the name to be able to cut it out with fancy scissors.
- After you have the names written, cut each one out using a fancy scissors. The ones I used create a scalloped edge. If you are in a pinch, you can certainly use regular scissors and they will look just as cute.
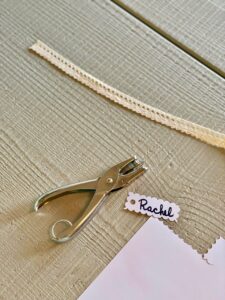
- Next, use a hole punch to punch a hole at the top of each name. After that, cut a ribbon piece, about 4 inches in length, and thread your ribbon through the hole.
- Last, tie the ribbon onto the stem of each faux pumpkin.
- Place on your table! You can let your guests take their pumpkin home with home at the end of the day for a fun gift.
Closing Tidbits for 4 Thrifty Thanksgiving Place Settings
There you have them! Each of these 4 thrifty Thanksgiving place setting ideas are inexpensive and super easy. You can whip them up in about 30 minutes flat but will add a festive and extra special touch to your dinner table.
I wish you and your family a peaceful Thanksgiving. My hope is that you can find many beautiful things to be grateful for, today and always.

Leave me a comment! How do you decorate your Thanksgiving table? I love hearing from you!


If you are new here, I’m Rachel, the writer and content creator here at The Antiqued Journey. I’m so happy to have you! I encourage you to stop by the ‘about me’ page to get to know me a little more.
Here on the blog, you will find loads of inspiration for decorating with vintage and antique decor, simple DIY crafts and many thrifting adventures. If that interests you, I invite you to sign up for my e-mail. You will receive a free digital download as a thank you!
Follow Along with The Antiqued Journey
- The Antiqued Journey shop
- Shop exclusive content in my LTK shop!


6 Comments. Leave new
Very cute Thanksgiving table ideas!
Thanks!!
I love these Rachel. I always love to add personal touches at place settings for special tables and all these ideas are fantastic! I can’t wait to see your Thanksgiving table this year. It’s going to be fabulous! XO- MaryJo
Thank you!!!
[…] They really help round out this whole table setting and add that perfect hint of harvest to each person’s seat. […]
[…] 4 Thrifty Thanksgiving Place Setting Ideas […]