Last Updated on October 22, 2024 by Rachel
Adorn your harvest table by creating a Thanksgiving centerpiece with a vintage crate!
To help ease you into setting the Thanksgiving table, I’m sharing an easy and thrifty centerpiece idea. The best part about this decor piece is that you can use items that you already have around your house to make it! Come along as I share, step by step, how to create a Thanksgiving centerpiece with a vintage crate.
A Warm and Heartfelt ‘Thank You’
Before we dive in, I just wanted to take a minute to say, from the bottom of my heart, thank you. It doesn’t matter if you have been here for one day, one month or one year, I am so, so grateful for you. Without you, there wouldn’t be The Antiqued Journey.
Because you show up week after week and support my little blog, I can live my dream of writing and creating content. So, as we inch ever closer to this day of giving thanks, I’m thankful for you.
Uncovering a Treasure: Transforming a Thrifted Crate for Thanksgiving
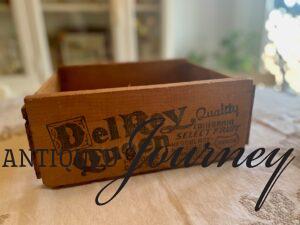
I was at the thrift store a few weeks ago and wasn’t finding much until I just happened to look up. There, sitting right above my head, was this wooden crate. I plucked it down from the shelf and examined it.
Weathered, with old nails and green graphics?! Yes, please!!
These crates, which are popular vintage decor items, are hard to come by and can fetch a hefty sum when found. So, I held my breath as a turned it over to find the price. $2.99!! I couldn’t believe it.
Holding in my excitement as I quickly walked to the register, there was a plethora of ideas racing through my head as to what I could do with this old crate.
Styling a One-of-a-Kind Centerpiece with Vintage Charm
The thrifted crate is what jumpstarted my Thanksgiving centerpiece idea and I ran with it. This approach will bring a unique and rustic charm to any table. The wood of the crate will provide warmth while its natural texture adds depth to the display.
As always, this post is meant to be a guide. Feel free to tweak it to fit your needs as well as swap decor for items that work well for you. Let’s get into it!
Items and Accents Used for a Thanksgiving Centerpiece
- wooden crate
- green scarf
- dried eucalyuptus stems
- ironstone pitcher
- faux acorns
- small pinecones
- burlap leaves
- one fairy light strand
Thanksgiving Centerpiece with a Vintage Crate
1. Choose a Table Linen.
To start, I placed an embroidered cream colored tablecloth over my table. It’s a nice neutral that won’t interfere with the centerpiece itself.
Then, I placed the empty crate in the center of my table.

2. Add Height Inside the Crate.
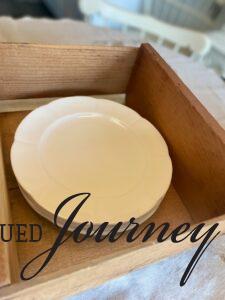
This crate is pretty deep. So that the decor could be easily seen, I knew I needed to add something inside of the crate to raise the base height up. I achieved this by placing a stack of small plates on the bottom of the crate.
Other items you could use to do this include a large bowl turned upside down, a tray, or books.
3. Place a Scarf Over the Base.
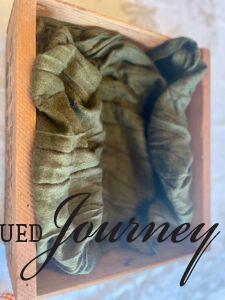
To cover the base, I chose to use a scarf in an olive green color. I originally thought about using a white lace linen but when I was digging through my scarves, I spotted this one. It’s the exact same color as the graphics on the crate and knew it was meant to be!
Side Note: I’m pretty sure I use scarves for decor purposes more than I actually wear them. If you find a pretty scarf at a thrift store for cheap, pick it up. I don’t know how many times I’ve reached for a scarf instead of a linen when decorating a shelf, a basket, or a vignette. They are so handy to have around!

I simply folded the scarf so that it fit snuggly into the crate and then fluffed it until I was happy with how it was laying. Tug the ends and sides snuggly around the base so that it doesn’t move around.
Tip: You will want the middle part to be flat so that the vase or pitcher sits level.
4. Place a Pitcher In The Middle.
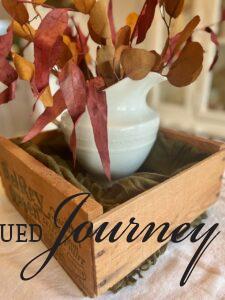
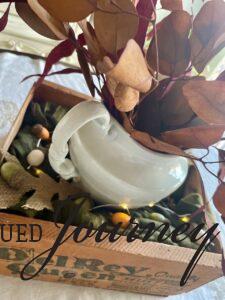
I shared all about this Ironstone pitcher a month ago in this thrifted goodies post. It’s one of my most favorite antique finds and knew it would be such a pretty accent piece to use for this centerpiece. So, that’s just what I did!
To add the pitcher to the crate, simply place it in the center, right on top of the flat spot on the scarf.

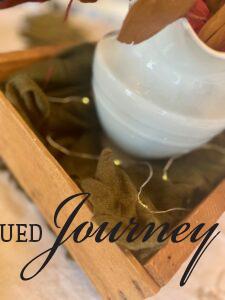
For some texture and life-like elements, I stuck some dried eucalyptus stems inside the pitcher. The maroon and dark gold stems add beautiful movement and really bring this whole display to life.
5. String Fairy Lights.
To place the fairy lights, wrap them gently around the base of the pitcher. Let them be loose and flow-y looking to give them a more natural feel.
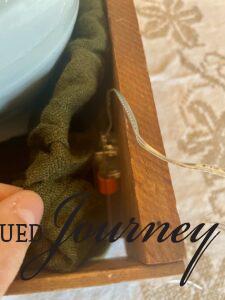
To conceal the battery pack, I placed it in the back corner underneath the scarf with the on-off switch facing up so it’s easy to get to.
6. Add Small Accessories.
The last step is to add small accessories that pair with the overall harvest theme of the centerpiece.
I went through my stash of extra decor and pulled out some extra faux acorns, miniature pinecones and a few burlap Oak leaves.
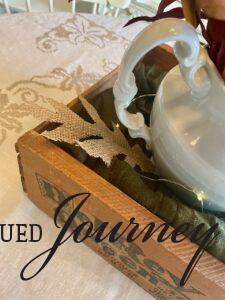
After the lights were in place, I arranged two burlap Oak leaves. I wish I had three of these but it’s what I had leftover from this DIY wreath project, so I just went with it.

I arranged one leaf in the back right corner and one in the front left corner. They are fairly large so I think two is a good number of leaves in this small centerpiece.
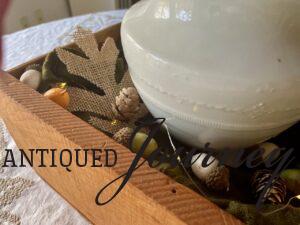
Next, I gingerly placed a handful of faux acorns and miniature pinecones around the base of the pitcher.
I didn’t want to use the same color acorns next to each other so I ended up placing them one at a time.
Tip: For maximum use of these small items, make sure to disperse them evenly throughout the display.

After the acorns were in place, I added a few pinecones. Again, I added these onto the base one at a time, facing them in different directions, almost like they just fell off a tree and landed there.
Thrifty Thanksgiving Centerpiece for a Memorable Feast
With that, we have a finished Thanksgiving centerpiece with a vintage crate!
I’m truly so happy with how this display turned out. The moody colors paired with the rustic wood box exudes the harvest theme in such a lovely way.
This centerpiece can also be picked up and moved easily to make room for all of the Thanksgiving food.

I say it all the time and I’ll say it again. You truly don’t need to spend tons of money to create a beautiful and welcoming home.
I spent a total of $3.00 on the crate and everything else I had on hand. It’s amazing what you can make using decor that you already have!

After I finished it, I had my hubby look at it and give me his thoughts. He said the cutest thing! He goes “it’s almost like looking down into a terrarium or aquarium because you can’t see the decor down in from a ways away, only the crate and pitcher, but then when you get up close it’s like a whole new surprise!”
My husband, everyone 🙂
Closing Tidbits
This Thanksgiving, make the holiday even more memorable with a one-of-a-kind rustic centerpiece that will bring warmth and charm to your meal. Through the use of thrifted finds, you can create a lovely and elegant display that will grace your fall gathering.
May you be encouraged to keep it simple and use what you have this season. What matters, over anything else, is connecting with the humans you love most over yummy food, drinks and pie.
From my home to yours, Happy Thanksgiving!

Leave me a comment. How do you set and decorate your Thanksgiving table? I love hearing from you!

Click the button in the left corner to pin and save it for later.

If you are new here, I’m Rachel, the writer and content creator here at The Antiqued Journey. I’m so happy to have you! I encourage you to stop by the ‘about me’ page to get to know me a little more.
Here on the blog, you will find loads of inspiration for decorating with vintage and antique decor, simple DIY crafts and many thrifting adventures. If that interests you, I invite you to sign up for my e-mail. You will receive a free digital download as a thank you!
Follow Along with The Antiqued Journey
- The Antiqued Journey shop
- Browse exclusive content in my LTK Shop
Other Holiday Posts to Enjoy

Thrifted Thanksgiving Tablescape






16 Comments. Leave new
Hi Rachel! I love your crate centerpiece. I can’t believe you found this thrifting! You styled it beautifully friend. Happy Thanksgiving! XO- MaryJo
Hello!
Thank you! I know…I couldn’t believe it, either!!
Happy Thanksgiving to you, as well!
Crates are so versatile and I love that yours has green font. What a buy! It’s the perfect smaller centerpiece look. Have a fun Thanksgiving Week, Rachel!
Hey, Debra!
They are!! I find myself thinking of all sorts of ways to use it. I was very excited to see this for such an inexpensive price!!
Thanks so much for coming by! Happy Thanksgiving!
Such a pretty centerpiece Rachel. There is just something special about old crates and white ironstone, I love them both.
Thanks so much, Wendy!! They are fantastic, aren’t they?!
Your centerpiece is just beautiful, Rachel. I love the simplicity. Sometimes less is more and you nailed it with this pretty arrangement. Perfect for Thanksgiving!
Hello!
Thanks so much, Jen!! Happy Thanksgiving!
[…] week I shared a thrifted Thanksgiving centerpiece using a vintage wooden crate. This decor piece is super simple and affordable. You might even have everything you need to make […]
The crate is another great find! I see them a lot but they are always more than I’m willing to spend. love the idea of using it for your centerpiece! Adding an ironstone pitcher and fairy lights is magical!
Thanks so much, Donna!! Yes…I see them off and on as well but like you said are always priced much too high. I was so astonished at the price on this one!!
[…] Layering pieces like this helps to create depth and interest when creating a centerpiece. […]
[…] Banana stands are versatile for other purposes as well such as to hold keys on an entryway table or as a simple centerpiece. […]
[…] decorate a table centerpiece […]
[…] simple way to use vintage dishes is to create a centerpiece for your dining table. Especially during the summer months, easy and breezy decor is the […]
[…] share my tips and tricks for sourcing decor as well as simple styling ideas on creating a Thanksgiving vignette. Follow along and learn how to create one for your own home! It’s sure to add a […]