Last Updated on April 16, 2025 by Rachel
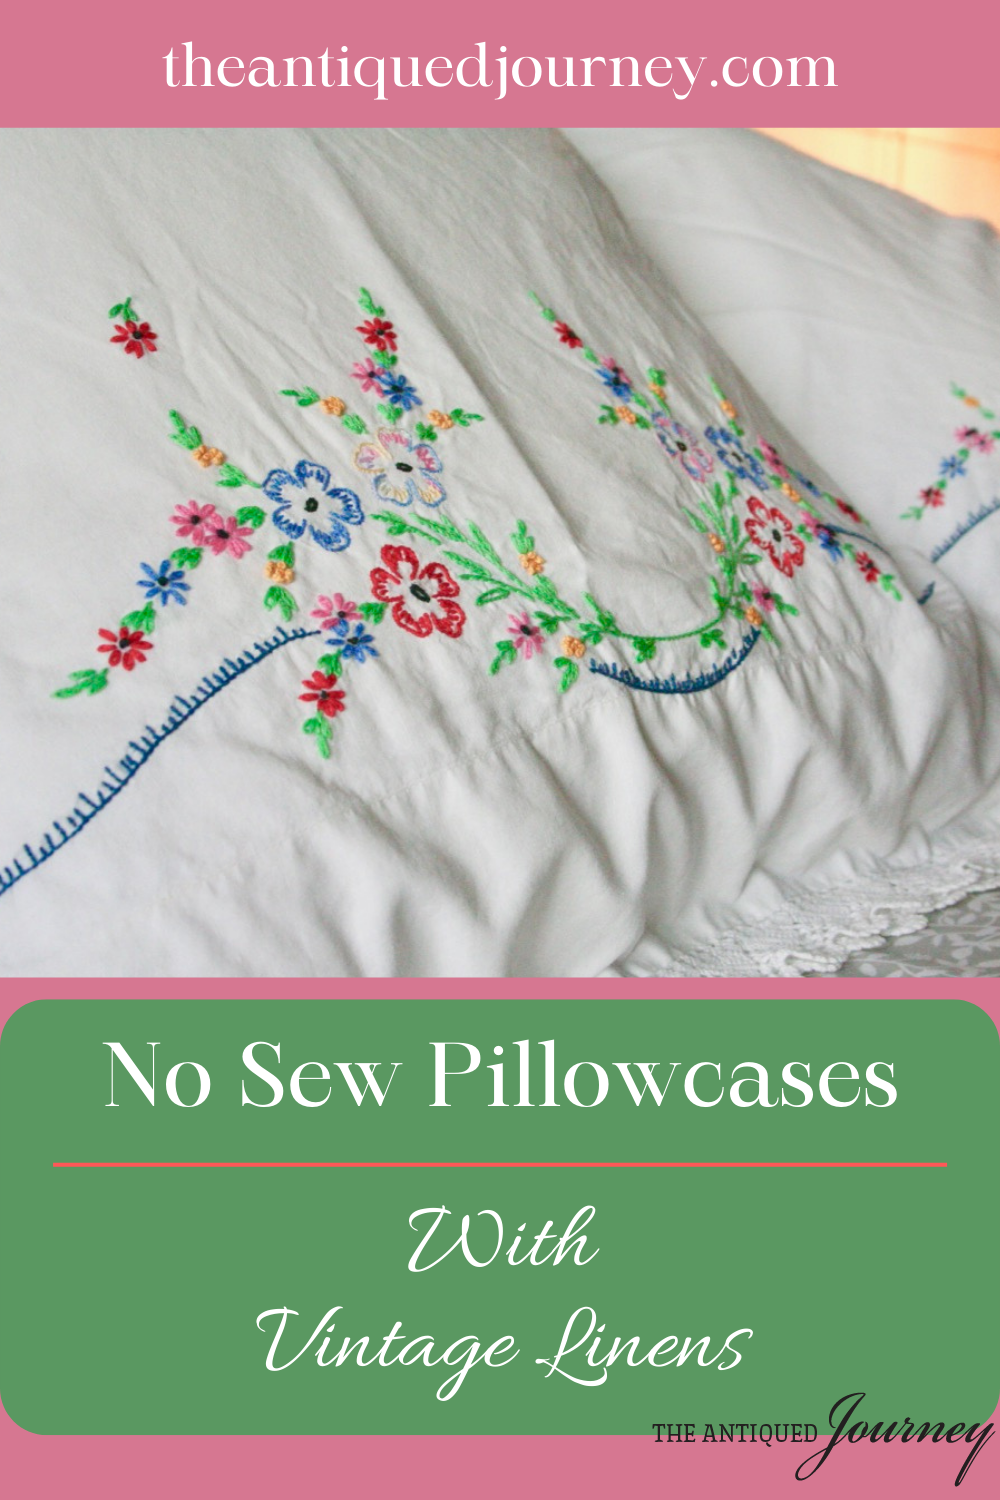
Learn a no-sew way of repurposing vintage embroidered pillowcases!
I found these vintage pillowcases at an estate sale and paid .50 cents for the pair! I’ve been holding onto them, trying to come up with a fun way to use them. Today’s the day for that project, repurposing vintage embroidered pillowcases! Come along as I show you how to turn these old linens into beautiful throw pillows…without sewing.
No-Sew Pillowcase DIY
I’ve had many comments on this post with many differing ideas and ways of how you could accomplish this pillowcase project and I appreciate each one of them! I do not own a sewing machine and I know many of my followers don’t have one either.
So, the main goal of this DIY is to show others that you can make pillow covers in an easy way without the use of a sewing machine.
Materials Needed for Repurposing Vintage Embroidered Pillowcases
- 2 18×18 pillow inserts
- 2 vintage king or queen size pillowcases
- scissors
- E6000 glue
- paper plate
- paper towels
- clothespins or paper clips
Re-Purposing Vintage Embroidered Pillowcases
The steps below are meant to be a guide. This is the way it made most sense to me. But, to others, it might make sense to accomplish the DIY in a different way. Take the ideas below and tweak them as you see fit!
Step 1: Insert the Pillows.
Lay the pillowcases flat on the floor and insert each 18×18 pillow. Push it about 1/4 of the way in.
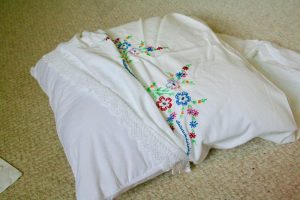
Then, gently pull the pillowcase up over the sides of the pillow insert.
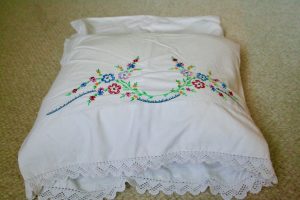
Step 2: Line Up the Open End of Each Pillowcase.
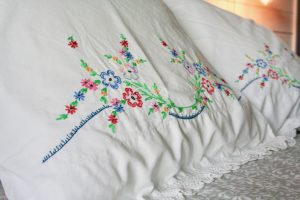
As you can see from the photo, my pillowcases have some pretty lace detailing on the open ends. I wanted to showcase that.
To do so, I lined up the scallops as best I could before gluing.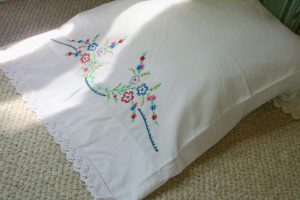
Step 3: Glue the Open Ends Together.
You might be wondering…glue? Really?! Yes, this no sew project called for heavy duty glue, like seam tape, only stronger.
Tip: The E6000 glue has a strong odor so you may want to do this in a well ventilated area or open a window.
Starting at one end of the seam, squeeze a little bead of glue at a time, making sure to press down firmly once applied.
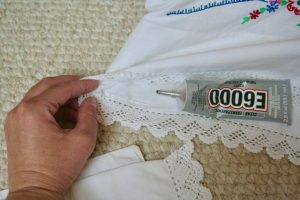
Tip: I used a paper towel to help press the glue firmly down as to not get so much glue on my fingers.
Continue that process until you have each end of the pillowcases securely glued. You will need to pause the project for today because that glue will need to dry for 24 hours before continuing.
The wait time for repurposing vintage embroidered pillowcases is totally worth it…I promise!

Step 4: Cut the Other End Open.
The next day, you will need to cut the other end of each of the pillowcases open using a fabric scissors.
Before doing this, you will need to measure how much of the fabric you need to cut off. You will want the insert to fit snuggly once finished.
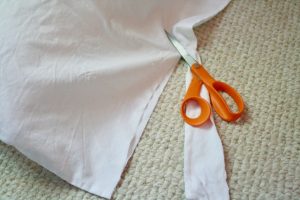
As an example, the pillowcases I used were each 30 inches long.
So, after fitting the pillow inside, I cut small strips of fabric off at a time until the length was roughly 13 inches.
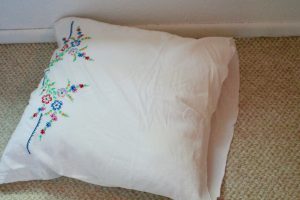
Step 5: Glue the Ends Down.
Once you have the pillow insert how you like it, you will want to fold the ends in to create a clean edge. You can secure the folded ends with a little E6000 glue.
To do this, fold up the bottom side first and glue that.
Next, flip the pillow over, fold that edge up, and glue.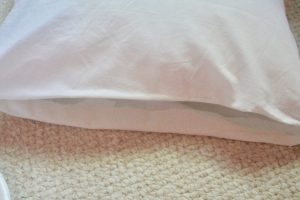
Then, to close the pillow, squeeze a little bead of glue right down the middle and press firmly down. Continue this process on both pillows until securely closed.
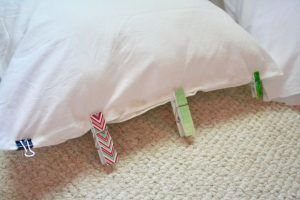
Tip: To be sure the sides stay adhered together, I clipped clothespins and paper clips across each pillow during the drying process.
Let the pillows dry for 24 hours.
Step 6: Style Your New Pillows!
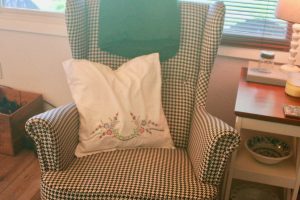
These pretty pillows will add so much charm and character to your couch, bed, or chair!
With a vintage touch, these new pillows exude personality into your home. They usher in a calm and collected feeling that only comes with old pieces. It’s such a joy to be able to take an old piece, like vintage embroidered pillowcases, and give it new life!
Closing Tidbits on Repurposing Vintage Embroidered Pillowcases
I truly hope that, if you have old linens or pillowcases, this tutorial on repurposing vintage embroidered pillowcases encourages you to do something neat with them!
Without you, these linens wouldn’t get to live on. But now, they can continue to bring happiness and be a part of your story. And that’s something worth celebrating.

Let me know in the comments below how this project turned out for you!

Just click the red button in the left corner!
If you are new here, I’m Rachel, the writer and content creator here at The Antiqued Journey. I’m so happy to have you! I encourage you to stop by the ‘about me’ page to get to know me a little more.
Here on the blog, you will find loads of inspiration for decorating with vintage and antique decor, simple DIY crafts and many thrifting adventures. If that interests you, I invite you to sign up for my e-mail. You will receive a free digital download as a thank you!
Follow Along with The Antiqued Journey
- The Antiqued Journey shop
- Browse exclusive content in my LTK shop
Shop Pretty Pillows
If you prefer to purchase new pillows for your home, I’ve linked some really beautiful options below!
Other DIY Projects To Enjoy
Easy Winter Basket Decor With Birch Logs




55 Comments. Leave new
[…] Vintage Embroidered Pillowcases This DIY vintage pillowcase project continues to be one of my top traffic pages on a weekly basis! Vintage linens will always […]
The embroidered part needs to be ironed from the inside with a cloth put down first and depending, maybe a little steam. It will smooth out the embroidery and look better.
thanks for the tip!! I will remember that for next time!
I like the way your final pillows look, but those pillowcases would have gone onto my bed as is before the cat could lick his ear! I still have the pillowcases I embroidered for my hope chest–in 1973! I hold my entire household together with E6000!
That stuff works…I’ll tell ya!! Thank you!
This is such a pretty way to display vintage linens, Rachel. I love the way your pillow came together and I can’t believe you found these for 50 cents – that is crazy! I’m definitely going to be on the lookout now too. Hope your week has been a special one, CoCo
Hi CoCo! Thank you! This is still one of my favorite projects. I’m amazed that the glue is still holding…that E6000 is something else!! Thanks for stopping by today!
I love vintage pillow cases, never thought of making pillow covers out of them! Love it:0 Thanks for sharing at Vintage Charm. xo Kathleen
Hi Kathleen! Thank you! I always love sharing..hope you have a lovely day!
I have a large collection of vintage pillowcases and find it hard to do anything with them other than use them as pillowcases. I have some used as café curtains that turned out pretty cute. Love your idea to keep them out so everyone can enjoy them. And thank you for linking up on Farmhouse Friday. So cute!
Hi Cindy!
Thanks SO much for stopping by today! I love linking up each Friday. I do appreciate you! Have a lovely weekend!
Cafe curtains! Brilliant.
That glue is awesome, I use it to hold Velcro on my hanging towels instead of buttons
It is! It’s great!
Great idea. Instead of using glue I’ll use sewing maschine and zipper so I can remove the pillow cases and wash them as needed so they will always look and smell nice.
Thanks! You have a fantastic idea. I made mine no-sew because I don’t have a sewing machine and wanted others in the same boat as me to be able to to make these as well.
I have several sets of pillow cases my mom embroidered over the years. One set I just received has been put away for so long I can’t get the “yellowing” out of the cases. I was trying to think of ideas to save the beautiful embroidery but cut out the old pillowcases. Thanks for this tip. I’m going to give it a go. Wish me luck.
Hi!!
That’s SO FUN!! Yes…save all the embroidery..it’s too pretty! I’m so happy this was helpful for you…I would love to see a photo of them when you are finished!! Thanks so much for the lovely comment. Happy day to you!
Oxy clean will get out the yellow, works on lace too even very delicate lace. Just dissolve the oxy in cool water then soak item for a bit ,the more yellow the longer. Then rinse , I let it air dry flat. Good luck 😃
Thanks so much, Margie!!
Soak the yellowed pillowcases in a solution of QxyClean and water. It may take several times over several days, but it works.
Try soaking in Oxi clean. It may take more than one soak. I bought a quilt at an auction and it had a big yellowish stain right in the middle of the quilt. I soaked it 2-3 times and the stain came out.
Tammy, I too have had good luck with multiple soaks with Oxi clean. I have also used perxoide and and vinegar to soak as well. sometime alternating those to get out the stains. Soak, wash, then repeat. It really does take some patience to get the stains out.
There’s a product called Retro-Clean made for yellowed linens etc. It’s a powder that you soak your items in. I bought several old, white baby gowns that were looking pretty sad. The Retro-Clean made them sparkle! I also hung them on the clothesline for an extra boost. The product is available on Amazon or directly from the company.
Hi Diana!
Thanks so much for the tip!! I’ll check it out next time some linens need to be cleaned!
Hi girls, I to love to collect vintage pillowcases. I think I must have 12 sets. I can help with the yellowing. I use clarifying shampoo, hydrogen peroxide, and a small amount of bleach, mix together with warm water. Let soak until the yellow is gone. I use hydrogen peroxide directly on blood stains. I use rust out on the rust stains.
I’m going to keep an eye out for pillow cases in my 2nd hand store now. I love this idea. I think I might glue a zipper in the seam though so I can take it off to wash it.❤️
That’s great!! Thanks so much! Yes…if you have a fun idea you want to implement on your project, do it! Thanks for the comment and have a lovely day!
There is a fabric glue called OK to Wash It. It might work even better on your project.
I had several embroidered vintage pillowcases from my grandmother. I made “bed dolls” from them using the fancy edge as the hem of the long flowing skirt. Dolls themselves were made from just white fabric to match the pillowcase, or if case large enough, would cut doll upper body, arms (no legs) and small bonnet from top 3rd of pillowcase. The head of doll was left “faceless” (no features), but a simple sun bonnet on the head gave it just enough personality but left the decorated embroidery the star of the piece.
Hi! That sounds lovely! Another great way to re-purpose these pretty pieces!
Love this. Question can you do the same with vintage sheets and tablecloths?
Thank you for all of your great ideas.
Hi Rosa!
Thanks so much for the kind comment! I’m sure you could do the exact same kind of thing with sheets and tablecloths. I’ve never tried doing that before but I bet if you measured and cut the pieces you wanted to use, they would turn out beautifully. I appreciate you being here! Hope you have a great day ahead!
Dritz offers great no sew options specifically for fabric that might be better for this project than E6000, check it out! Liquid Stitch, Stitch Witchery, & Heat Bond all by Dritz; dependable sewing notions since 1921. #dritz #prym
Could you glue the zipper with the E6000?
I’m sure you could! That’s a very strong glue so it should hold. I haven’t tried it before but you could at least try!
I made a pillowcase dress for my first granddaughter from some pillowcases my grandmother embroidered for me when I was a young woman. It is so very special to see her donning this family treasure!
Well that is just SO COOL!!! How adorable! Thanks so much for sharing!!
This is my first time visiting your website; I will be returning for more great ideas.
Is there a possibility for other suggestions for vintage pillowcases?
I’m a beginner in many craft/ decorating ideas and projects.
I would love any ideas, advice, or to help with my journey.
Hi Katrina!
First of all, thanks so much for finding me! I’m so happy to have you here.
I’m also very happy that you are finding joy in DIY projects. When I was a beginner, I didn’t really have many places to turn to for ideas or advice.
If you go into my DIY category on the top of my main website page, you will find tons of ideas or projects you could try. I try and keep my DIY’s pretty simple and use easy to follow instructions.
As far as pillowcases, this is the only post I have for that specific thing. I do have posts on vintage linens, vintage handkerchiefs and various posts on thrifting for vintage linens if that is helpful for you.
Poke around on my blog and see if anything suits your fancy. If you have specific questions for certain projects or need advice, feel free to send me an e-mail at theantiquedjourney@gmail.com.
Thanks again for being here!! Hope you enjoy the day!
Several years ago, a friend had a group of college gals over for dinner. She had found lots of old pillowcases and draped them over the back of each chair. Our utensils to eat with were old cooking tools…spatulas, forks and spoons. It was so almost impossible to eat with those long-handled utensils. We used the pillowcase for a bib. It was necessary! Our gift to take home were the pillowcases. What fun memories.
Hi Dolly!
That’s hilarious!! What a fun story…thanks so much for sharing that with me!
I’m an old lady who learned to embroider pillowcases back in the 40’s. When I grew up I found I loved crocheting lace and doiles to be as much fun as embroidering. I treasure the handmade pillowcases that I’ve made and those I’ve found at yard sales and thrift shops. I’d never be able to cut or glue one. I’ve used them for pillow covers just by folding over the embroidered end to the front without any sewing or gluing. They look just as pretty sitting on a chair or sofa, and you still have an intact pillowcase. If you have a pair, you can use curtain rod clips attached to the bottoms to hang them in a kitchen or door window. Bless you for wanting to preserve and enjoy old linens – they’re things of the past, just like me!
Hi, Ruth!
Thanks so much for your lovely comment! I love hearing stories like this…this is why I write and why I do what I do.
I appreciate your tips and ideas! I have thought about using them for cafe curtains in my kitchen window..I think that would be so pretty!
Old things speak to me and that’s why I love to write about them so much. Thanks for stopping by…I appreciate it more than you know! Hope you have a lovely day!
Deanna Young (above) has the right idea. I always mend and attach fabrics of any type using Stitch Witchery. It comes in a roll (like scotch tape). Cut the length you need & sandwich it between 2 fabrics (for the pillow cover: inside out). Iron on high with a damp towel on top. Sticks together ‘seamlessly’ & is washable. No fumes, no glue globs. Make all types of new sew fabric decor using this product. I use E6000 for hard surfaces.
Hi Robin!
Thanks for the advice. I made these three years ago now and had never even heard of Stitch Witchery. If I was to make them again now, I would go about it differently. It’s all part of the learning process! Thanks for reading!!
I also have some old pillowcases y sweet Mom had embroidered. I have tried to think of some way to use them and enjoy her handy work, will use these for this project. Thank you so much for this post.
Hi Georgie!!
What a lovely comment…thanks so much!! I’m so happy that you will be able to use your mom’s pillowcases! I appreciate you stopping by and letting me know. I hope they turn out well for you!
I love all those wonderful ideas. I have taken vintage embroidered pillow case ends, cut them off, and stitched them onto the edge of an existing pillow that has a cute print that matches the colors in the embroidery. That way the embroidered fabric falls over the printed pillow like a flap and is very cute.
Hi Carol!
Thanks so much!! I LOVE your idea…that sounds so pretty! Thanks for your thoughtful comment! Hope you have a lovely day!
I’ve been tossing around the notion of embroidering one of these original “pillow tubing” patterns from my grandmother’s sewing stash, but I haven’t embroidered much since she taught me in 1975. I’m the oldest woman in my family now, so I’ve inherited all the keepsakes & photos of all the memories that meant something to someone in my family. I want to make a couple scrappy or rag quilts with her voluminous bits of embroidered linens as well as 4 generations of baby clothes, dance costumes, formal wear, etc. that my mom saved. I could probably make 3 or 4…or five or six…lol. Love your ideas.
Hi, Joanie!
That’s so special how you have inherited all of those treasures!! Thanks so much for sharing and for stopping by today. I hope you come up with something super cool to do with everything! Have a great day!
[…] I went a little out of the box. A few months ago, a very sweet reader sent me a whole bunch of vintage pillowcases. I’ve been hanging onto them, just waiting for a good time to use them, and this occasion […]
I’m soooo glad I found your Pinterest page! I’m 76 and I have several pillow cases and sheets that my grandmother embroidered and I’ve wondered what I can do with them. I would never just throw them away!!!! So now I’m going to make curtains with the sheets/bed toppers and deco pillows with the cases.
Now what about dollies? I’ve seen a couple of ideas but I’m not sold on them.
Not to be dreary but my years are coming to a close and I need to make these treasures into something special! Maybe a family member would want to keep them. ❤️
Hi, Susan!
Me too! That’s exciting!
I love that idea…they are going to be so pretty!
For doilies, you could try framing them in pretty picture frames…like back them with a pretty cardstock or something and then use those clear photo adhesive rounds to attach the doilies…you could also use shadow boxes and do the same thing.
Hope that helps! Thanks so much for the lovely comment..I truly appreciate it!