1. Home
  2. DIY Projects
  3. How To Paint Furniture From Target

How To Paint Furniture From Target

Share this post. Share the Journey!

This tutorial will walk you through how to paint furniture from Target!

Years ago, before I was into vintage decorating, I purchased a teal colored cabinet from Target. At the time, we lived in a very small apartment so I bought this cabinet to use for storage. I loved the color teal at the time and decorated with it in excess. This cabinet still proves to be super useful in our home now but I am so over the teal, so I gave it an upgrade. Follow along as I transform this piece and learn how to paint furniture from Target!

This post contains affiliate links. That simply means I earn a small commission on any clicked links at no cost to you. As an Amazon Associate I earn on qualifying purchases. Thank you for supporting my small business!

Supplies Needed

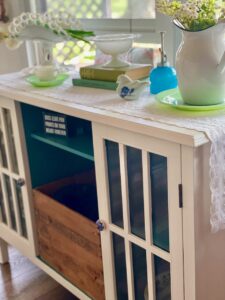
an old cabinet from Target that has been painted white with new blue and white knobs

How To Paint Furniture From Target

Here is the before look of the cabinet. There is nothing really wrong with the cabinet other than the color. I do like teal but it’s just too loud for my space since my style has evolved over the past few years. I’ve been looking for an antique cabinet for awhile to replace this one but haven’t found one that is just as functional. You see, our cable and internet hook ups are along this wall and there is not an easy way to move them, though I so wish there was. The doors on this one conceal the modems and cable boxes perfectly while still enabling me to decorate on it. I call it my credenza even though it’s clearly not 🙂

an old teal cabinet from Target with glass doors

Step 1: Remove doors and shelves.

First, I unscrewed the door hinges to remove the doors. It was going to be easier to paint the doors if they were flat on the ground. I also removed the shelves.
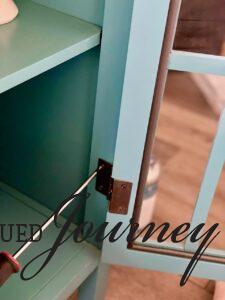
removing hinges from a cabinet door from Target to prep for painting

Step 2: Sand the cabinet.

I took the cabinet outside and roughed up the surface using an electric sander and 100 grit sandpaper.

cabinet outside ready to be sanded with an electric sander

I simply went over the surface with the sander to pull up a little bit of the paint. This also helps to get the shiny finish off of the cabinet so that the paint adheres to it.

fine powder from sanding a Target furniture piece

As you can see in the photo, a fine teal colored powder came off. The sander really did a good job of taking the paint off around the edges which is what I was hoping for.

side of a Target cabinet that has been sanded and ready for paint

Here is one of the sides of the cabinet after sanding. That’s about the extent of the sanding that I did! I went over it with a dry rag to remove all of that powder and then used a damp paper towel to get a really clean surface for painting.

Step 3: Paint the cabinet.

I should mention here that I am only painting the shell or outside of the cabinet and the doors. The reason for this is if I painted the whole cabinet, meaning the outside and the inside where the shelves sit, the black boxes from the cable and internet would stick out like a sore thumb against the white. So I’m leaving the middle part teal as well as the shelves that sit inside of the doors. Sounds interesting, right? I think it works! Below is the paint that I chose. I really love the creamy white color of it because it’s neutral enough to decorate around.

a paint color called Swiss Coffee from Behr for painting a Target cabinet

Next, I simply poured a small amount of paint in a tray and used a 3/4 inch roller to apply it. I realize I should have used a primer first but there wasn’t any in my house at the time and I didn’t want to make another trip to the store, so it is what it is! There wasn’t an issue with the paint not sticking or being too see through without primer, so if you don’t have primer, it should still work just fine.
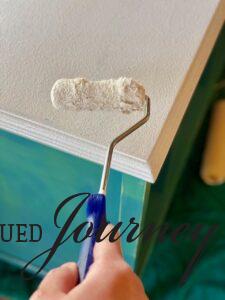
painting a Target cabinet with white paint and a 3/4 inch roller

I kept applying paint, one coat at a time, until the cabinet looked smooth and finished without any splotches or inconsistency. It took 4 coats of paint total. To get in the crevices and in all of the edges, I used a small craft paintbrush. It worked fabulously!
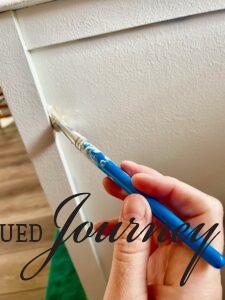
a small craft paintbrush for using to get paint into edges and crevices of a cabinet

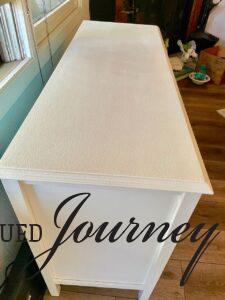
This is what the outside of the cabinet looked like after 4 coats of paint!

a side view of a Target cabinet painted white

Step 4: Tape off glass.

Because the grids were not removeable, I needed to use painters tape to cover the glass before painting it. This process was a little tedious because I had to make sure the tape was going into every single corner. Luckily it was a beautiful day outside so I didn’t mind!

tape off glass on cabinet doors to prep for painting

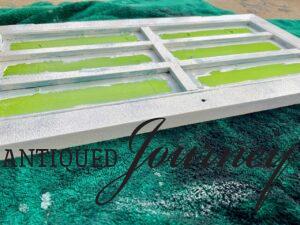
I kept taping until all of the glass was covered, as seen below. Then, using a screwdriver, I removed the knob.

tape on glass of cabinet door ready for paint

Step 5: Sand the doors.

To rough up the doors for painting and to remove the shiny surface, I simply hand sanded them with 150 grit sandpaper. I made sure to get along the edges really well as well as along the panes. Again, I used a rag to clean off the dust and then a damp paper towel to prep it for paint.
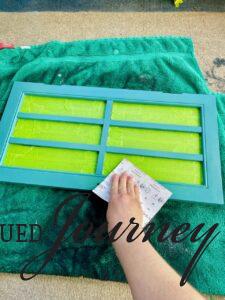
hand sand cabinet doors to prep for painting

Step 6: Paint the doors.

To paint the doors, I first started with the small craft paintbrush to get into the crevices of the panes.

painting the doors of cabinet from Target with creamy white paint

Then, using the same 3/4 inch roller, I rolled the top and the sides. Just like the cabinet itself, the doors got 4 coats of paint.

first coat of white paint on cabinet doors from Target

I let the doors dry completely before removing the tape.
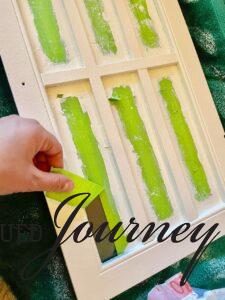
remove painters tape from glass cabinet doors

Gently, I pulled back all the tape to finish the door! Obviously there are two doors and I repeated this same process on the other one.

new white doors on an old cabinet from Target

Step 7: Attach the new knobs.

I could have used the knobs that came with this cabinet originally but they felt too modern with the new color palette. So, I went to Hobby Lobby and picked up these pretty knobs! They happened to be 40% off that day so I think I paid around $6 for both.

blue and white floral knobs for a cabinet

These knobs came with a washer and nut in the back so all I had to do was screw them into the existing hole. Super easy!
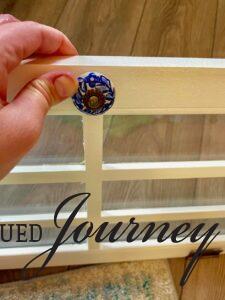
attach new knob to a Target cabinet door

Step 8: Reattach doors.

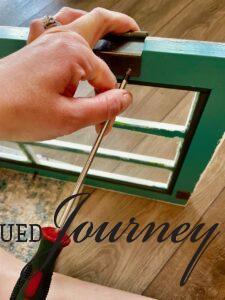
From there, I re-attached the hinges and screwed the doors back onto the cabinet.
screw hinge back onto a cabinet door that was painted

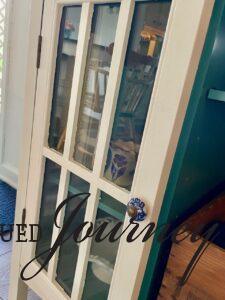
Here is the left door back in it’s place!
a cabinet from Target that's been re-painted white with a new blue and white knob

Step 9: Clean the glass.

I don’t have a picture of this but my husband helped me with this part. As you can see above, there is some paint bleeding onto the glass even though I did my best to tape it all off! He used a small razor blade and scraped off all the areas where there was paint on the glass. This made the doors look so clean and precise!

Step 10: Style and display!

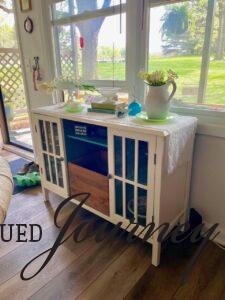
It’s done! After re-attaching the millions of cords to the electronic boxes that you can’t see behind it, I moved the cabinet back in it’s place and started to decorate it.

a Target cabinet and door that has been re-painted white with blue and white knobs

love how it turned out. The creamy white on it looks so pretty, especially with all of my vintage decor! The old wooden crate, which holds all of Tilly’s outside items, really pops now against the white, which I adore. I feel like you didn’t even notice the crate before because it was blending in with the dark color.

a Target cabinet that was been re-painted white and displayed with vintage decor

Having this cabinet white brightens up this whole wall and it’s just gorgeous. The teal that you can still see feels like background noise now and I really don’t notice it at all. It makes my whole living area feel cohesive and all of the areas flow together in a much more practical manner. Also, excuse the shoes…real life over here!
Closing Tidbits On How To Paint Furniture From Target

Re-painting this old cabinet has transformed my living room and it was such a fun project for me to work on…one that I had been waiting to do all winter. I still would like to find an antique wood cabinet for this spot but this will totally do for now. I hope you found encouragement here on how to paint furniture from Target! With a little creativity and a weekend of work, you can turn any old piece from a retail store into something special that fits your style and your home’s aesthetic. May you find hope and potential in the little things and turn it into something beautiful.

signature from The Antiqued Journey

Other Posts You Might Enjoy

Hope and Home

Patriotic Decorating With Vintage Enamelware

Simple Summer Decorating

Thrifted Decor For Summer

If you haven’t checked out The Antiqued Journey shop yet, I would love it if you would poke around in there a bit! You will find custom made t-shirts, mugs and bags, just to name a few. Buy something for yourself and a friend! Your support helps me to keep writing weekly content. Thank you!

For more furniture painting ideas, tips and tricks, visit Cindy over at Reinvented Delaware! She shares amazing ways of re-purposing and re-painting furniture!

Shop This Post

19 Comments. Leave new

  • Hi Rachel! This was a great post. Yes, I know exactly what you mean. My style has evolved over the years too. I find that I consistently gravitate toward neutral furniture and use accents for color. (Whereas I used to buy some painted furniture in different colors) And those darn internet and cable hook ups! Ugh! Not decorator friendly. Thanks for sharing an inspiring post. I always love it when we can reuse what we already have on hand.

    Reply
    • Rachel Granholm
      June 23, 2022 7:33 pm

      Thanks, Anna!! I know, right?! Those dang black boxes! I always appreciate your comments, friend!

      Reply
  • your cabinet turned out really pretty, Rachel. You went to a lot of work but it now looks like a real antique piece. very mission/craftsman style from the early 1900’s. I love how you left the shelves teal. I love color too, but now in just smaller doses. great job!

    Reply
    • Rachel Granholm
      June 23, 2022 7:32 pm

      Hi Debra!!
      Thank you so much! I always appreciate your comments and thanks so much for stopping by today!!

      Reply
  • Michele - vintage home designs
    June 23, 2022 7:16 pm

    Such a beautiful makeover Rachel! I love how it turned out!

    Reply
  • What a HUGE transformation, Rachel! You did such a great job painting this cabinet. I LOVE the color you chose as well. I’m trying to convince my parents we should paint the interior of my childhood home that same color. It’s really beautiful! Big hugs, CoCo

    Reply
    • Rachel Granholm
      June 24, 2022 10:40 am

      Hi!
      Thank you!! It was such a fun project…thanks so much for stopping by and reading today, CoCo!!

      Reply
  • Paula Biessener
    June 24, 2022 11:11 am

    The cabinet turned out great Rachel! It actually makes the room look bigger!

    Paula

    Reply
  • meagan trento
    June 25, 2022 4:58 pm

    Came out great! I love painting furniture. It’s such a great way to repurpose what you already own.

    Reply
  • Beth Anderson
    July 2, 2022 8:29 pm

    I recognize that cabinet!❤️

    Reply
  • […] How To Paint Furniture From Target […]

    Reply
  • I’m loving the pop of color on the inside of this cabinet Rachel! You did a great job on this piece! In fact, I wanted others to see it too so I am featuring this post on Tuesday Turn About this week! Hope to see you at the party!

    Reply
    • Rachel Granholm
      July 12, 2022 2:17 pm

      Hi Cindy!
      Thank you very much!! I appreciate your lovely comment and the support!! I’ll see you at the party tonight!

      Reply
  • […] until you see what color this Target piece of furniture started out as. The Antiqued journey shares the best tips on how to paint a piece of furniture from […]

    Reply
  • Oh Amy! I love this. Okay Swiss Coffee must be a cousin to my fav Mascarpone. Oh I think I am going to regret what I did to my hutch that is now in my office. It went from retailer black, to grey to white and then I painted the glass panes because I painted the interior white and I didn’t like staring at my work paper files etc. Shoot. I may need to paint the interior and scrape the panes! Love the inspo! Thanks Sweetie! laura in Colorado

    Reply
    • Rachel Granholm
      August 14, 2022 9:26 am

      Thanks so much, Laura!! I’m grateful that you stopped by and found this one helpful! After a few months, I’m still loving how I painted it. It works out wonderfully!

      Reply

Leave a Reply

Your email address will not be published. Required fields are marked *

Fill out this field
Fill out this field
Please enter a valid email address.
You need to agree with the terms to proceed

Hello I’m Rachel.

I’m so glad you are here! Old things are my jam. Antique malls and thrift stores are my happy places.

Here on the blog I love to share my excitement, knowledge, and ideas about all things antique and vintage. Let’s journey together!

Join Our Antiqued Journey

community

Home decor inspiration, DIY projects, and recipes from our kitchen straight to your inbox.

    Popular

    Check out
    The Antiqued Journey
    Shop!

    FREE SHIPPING on all orders

    Custom designed logo gear by Rachel of The Antiqued Journey.
    1. Home
    2. DIY Projects
    3. How To Paint Furniture From Target

    How To Paint Furniture From Target

    Share this post. Share the Journey!

    This tutorial will walk you through how to paint furniture from Target!

    Years ago, before I was into vintage decorating, I purchased a teal colored cabinet from Target. At the time, we lived in a very small apartment so I bought this cabinet to use for storage. I loved the color teal at the time and decorated with it in excess. This cabinet still proves to be super useful in our home now but I am so over the teal, so I gave it an upgrade. Follow along as I transform this piece and learn how to paint furniture from Target!

    This post contains affiliate links. That simply means I earn a small commission on any clicked links at no cost to you. As an Amazon Associate I earn on qualifying purchases. Thank you for supporting my small business!

    Supplies Needed

    an old cabinet from Target that has been painted white with new blue and white knobs

    How To Paint Furniture From Target

    Here is the before look of the cabinet. There is nothing really wrong with the cabinet other than the color. I do like teal but it’s just too loud for my space since my style has evolved over the past few years. I’ve been looking for an antique cabinet for awhile to replace this one but haven’t found one that is just as functional. You see, our cable and internet hook ups are along this wall and there is not an easy way to move them, though I so wish there was. The doors on this one conceal the modems and cable boxes perfectly while still enabling me to decorate on it. I call it my credenza even though it’s clearly not 🙂

    an old teal cabinet from Target with glass doors

    Step 1: Remove doors and shelves.

    First, I unscrewed the door hinges to remove the doors. It was going to be easier to paint the doors if they were flat on the ground. I also removed the shelves.

    removing hinges from a cabinet door from Target to prep for painting

    Step 2: Sand the cabinet.

    I took the cabinet outside and roughed up the surface using an electric sander and 100 grit sandpaper.

    cabinet outside ready to be sanded with an electric sander

    I simply went over the surface with the sander to pull up a little bit of the paint. This also helps to get the shiny finish off of the cabinet so that the paint adheres to it.

    fine powder from sanding a Target furniture piece

    As you can see in the photo, a fine teal colored powder came off. The sander really did a good job of taking the paint off around the edges which is what I was hoping for.

    side of a Target cabinet that has been sanded and ready for paint

    Here is one of the sides of the cabinet after sanding. That’s about the extent of the sanding that I did! I went over it with a dry rag to remove all of that powder and then used a damp paper towel to get a really clean surface for painting.

    Step 3: Paint the cabinet.

    I should mention here that I am only painting the shell or outside of the cabinet and the doors. The reason for this is if I painted the whole cabinet, meaning the outside and the inside where the shelves sit, the black boxes from the cable and internet would stick out like a sore thumb against the white. So I’m leaving the middle part teal as well as the shelves that sit inside of the doors. Sounds interesting, right? I think it works! Below is the paint that I chose. I really love the creamy white color of it because it’s neutral enough to decorate around.

    a paint color called Swiss Coffee from Behr for painting a Target cabinet

    Next, I simply poured a small amount of paint in a tray and used a 3/4 inch roller to apply it. I realize I should have used a primer first but there wasn’t any in my house at the time and I didn’t want to make another trip to the store, so it is what it is! There wasn’t an issue with the paint not sticking or being too see through without primer, so if you don’t have primer, it should still work just fine.

    painting a Target cabinet with white paint and a 3/4 inch roller

    I kept applying paint, one coat at a time, until the cabinet looked smooth and finished without any splotches or inconsistency. It took 4 coats of paint total. To get in the crevices and in all of the edges, I used a small craft paintbrush. It worked fabulously!

    a small craft paintbrush for using to get paint into edges and crevices of a cabinet

    This is what the outside of the cabinet looked like after 4 coats of paint!

    a side view of a Target cabinet painted white

    Step 4: Tape off glass.

    Because the grids were not removeable, I needed to use painters tape to cover the glass before painting it. This process was a little tedious because I had to make sure the tape was going into every single corner. Luckily it was a beautiful day outside so I didn’t mind!

    tape off glass on cabinet doors to prep for painting

    I kept taping until all of the glass was covered, as seen below. Then, using a screwdriver, I removed the knob.

    tape on glass of cabinet door ready for paint

    Step 5: Sand the doors.

    To rough up the doors for painting and to remove the shiny surface, I simply hand sanded them with 150 grit sandpaper. I made sure to get along the edges really well as well as along the panes. Again, I used a rag to clean off the dust and then a damp paper towel to prep it for paint.

    hand sand cabinet doors to prep for painting

    Step 6: Paint the doors.

    To paint the doors, I first started with the small craft paintbrush to get into the crevices of the panes.

    painting the doors of cabinet from Target with creamy white paint

    Then, using the same 3/4 inch roller, I rolled the top and the sides. Just like the cabinet itself, the doors got 4 coats of paint.

    first coat of white paint on cabinet doors from Target

    I let the doors dry completely before removing the tape.

    remove painters tape from glass cabinet doors

    Gently, I pulled back all the tape to finish the door! Obviously there are two doors and I repeated this same process on the other one.

    new white doors on an old cabinet from Target

    Step 7: Attach the new knobs.

    I could have used the knobs that came with this cabinet originally but they felt too modern with the new color palette. So, I went to Hobby Lobby and picked up these pretty knobs! They happened to be 40% off that day so I think I paid around $6 for both.

    blue and white floral knobs for a cabinet

    These knobs came with a washer and nut in the back so all I had to do was screw them into the existing hole. Super easy!

    attach new knob to a Target cabinet door

    Step 8: Reattach doors.

    From there, I re-attached the hinges and screwed the doors back onto the cabinet.

    screw hinge back onto a cabinet door that was painted

    Here is the left door back in it’s place!

    a cabinet from Target that's been re-painted white with a new blue and white knob

    Step 9: Clean the glass.

    I don’t have a picture of this but my husband helped me with this part. As you can see above, there is some paint bleeding onto the glass even though I did my best to tape it all off! He used a small razor blade and scraped off all the areas where there was paint on the glass. This made the doors look so clean and precise!

    Step 10: Style and display!

    It’s done! After re-attaching the millions of cords to the electronic boxes that you can’t see behind it, I moved the cabinet back in it’s place and started to decorate it.

    a Target cabinet and door that has been re-painted white with blue and white knobs

    love how it turned out. The creamy white on it looks so pretty, especially with all of my vintage decor! The old wooden crate, which holds all of Tilly’s outside items, really pops now against the white, which I adore. I feel like you didn’t even notice the crate before because it was blending in with the dark color.

    a Target cabinet that was been re-painted white and displayed with vintage decor

    Having this cabinet white brightens up this whole wall and it’s just gorgeous. The teal that you can still see feels like background noise now and I really don’t notice it at all. It makes my whole living area feel cohesive and all of the areas flow together in a much more practical manner. Also, excuse the shoes…real life over here!

    Closing Tidbits On How To Paint Furniture From Target

    Re-painting this old cabinet has transformed my living room and it was such a fun project for me to work on…one that I had been waiting to do all winter. I still would like to find an antique wood cabinet for this spot but this will totally do for now. I hope you found encouragement here on how to paint furniture from Target! With a little creativity and a weekend of work, you can turn any old piece from a retail store into something special that fits your style and your home’s aesthetic. May you find hope and potential in the little things and turn it into something beautiful.

    signature from The Antiqued Journey

    Other Posts You Might Enjoy

    Hope and Home

    Patriotic Decorating With Vintage Enamelware

    Simple Summer Decorating

    Thrifted Decor For Summer

    If you haven’t checked out The Antiqued Journey shop yet, I would love it if you would poke around in there a bit! You will find custom made t-shirts, mugs and bags, just to name a few. Buy something for yourself and a friend! Your support helps me to keep writing weekly content. Thank you!

    For more furniture painting ideas, tips and tricks, visit Cindy over at Reinvented Delaware! She shares amazing ways of re-purposing and re-painting furniture!

    Shop This Post

    19 Comments. Leave new

    • Hi Rachel! This was a great post. Yes, I know exactly what you mean. My style has evolved over the years too. I find that I consistently gravitate toward neutral furniture and use accents for color. (Whereas I used to buy some painted furniture in different colors) And those darn internet and cable hook ups! Ugh! Not decorator friendly. Thanks for sharing an inspiring post. I always love it when we can reuse what we already have on hand.

      Reply
      • Rachel Granholm
        June 23, 2022 7:33 pm

        Thanks, Anna!! I know, right?! Those dang black boxes! I always appreciate your comments, friend!

        Reply
    • your cabinet turned out really pretty, Rachel. You went to a lot of work but it now looks like a real antique piece. very mission/craftsman style from the early 1900’s. I love how you left the shelves teal. I love color too, but now in just smaller doses. great job!

      Reply
      • Rachel Granholm
        June 23, 2022 7:32 pm

        Hi Debra!!
        Thank you so much! I always appreciate your comments and thanks so much for stopping by today!!

        Reply
    • Michele - vintage home designs
      June 23, 2022 7:16 pm

      Such a beautiful makeover Rachel! I love how it turned out!

      Reply
    • What a HUGE transformation, Rachel! You did such a great job painting this cabinet. I LOVE the color you chose as well. I’m trying to convince my parents we should paint the interior of my childhood home that same color. It’s really beautiful! Big hugs, CoCo

      Reply
      • Rachel Granholm
        June 24, 2022 10:40 am

        Hi!
        Thank you!! It was such a fun project…thanks so much for stopping by and reading today, CoCo!!

        Reply
    • Paula Biessener
      June 24, 2022 11:11 am

      The cabinet turned out great Rachel! It actually makes the room look bigger!

      Paula

      Reply
    • meagan trento
      June 25, 2022 4:58 pm

      Came out great! I love painting furniture. It’s such a great way to repurpose what you already own.

      Reply
    • Beth Anderson
      July 2, 2022 8:29 pm

      I recognize that cabinet!❤️

      Reply
    • […] How To Paint Furniture From Target […]

      Reply
    • I’m loving the pop of color on the inside of this cabinet Rachel! You did a great job on this piece! In fact, I wanted others to see it too so I am featuring this post on Tuesday Turn About this week! Hope to see you at the party!

      Reply
      • Rachel Granholm
        July 12, 2022 2:17 pm

        Hi Cindy!
        Thank you very much!! I appreciate your lovely comment and the support!! I’ll see you at the party tonight!

        Reply
    • […] until you see what color this Target piece of furniture started out as. The Antiqued journey shares the best tips on how to paint a piece of furniture from […]

      Reply
    • Oh Amy! I love this. Okay Swiss Coffee must be a cousin to my fav Mascarpone. Oh I think I am going to regret what I did to my hutch that is now in my office. It went from retailer black, to grey to white and then I painted the glass panes because I painted the interior white and I didn’t like staring at my work paper files etc. Shoot. I may need to paint the interior and scrape the panes! Love the inspo! Thanks Sweetie! laura in Colorado

      Reply
      • Rachel Granholm
        August 14, 2022 9:26 am

        Thanks so much, Laura!! I’m grateful that you stopped by and found this one helpful! After a few months, I’m still loving how I painted it. It works out wonderfully!

        Reply

    Leave a Reply

    Your email address will not be published. Required fields are marked *

    Fill out this field
    Fill out this field
    Please enter a valid email address.
    You need to agree with the terms to proceed

    Hello I’m Rachel.

    I’m so glad you are here! Old things are my jam. Antique malls and thrift stores are my happy places.

    Here on the blog I love to share my excitement, knowledge, and ideas about all things antique and vintage. Let’s journey together!

    Join Our Antiqued Journey

    community

    Home decor inspiration, DIY projects, and recipes from our kitchen straight to your inbox.

      Popular

      Check out
      The Antiqued Journey
      Shop!

      FREE SHIPPING on all orders

      Custom designed logo gear by Rachel of The Antiqued Journey.
      Menu