Last Updated on February 20, 2025 by Rachel
These pretty spring cloche ideas with vintage decor adds a pop of cheery color to your home for the season!
The inspiration for this post was to create a terrarium of sorts, reminiscent of an English cottage garden. With a recently acquired glass cloche dome, I set to work. Join me as I share pretty spring cloche ideas with vintage decor that can be styled on a mantle, shelf, counter, and more!
Budget-Friendly Spring Decorating with Thrifted Finds
The other day, as I was just wishing for green grass and flowers, an idea came to me. If there can’t be green outside yet, I can make my own Spring inside, so that’s just what I did.
Many of us are just craving spring…it feels so close I can just taste it! An easy way to start slowly filtering spring into your home is by styling a cloche.
This is actually the first time I’ve ever decorated with a cloche dome before, mainly because they are so expensive! However, after looking and looking for a reasonably priced glass cloche dome, I stumbled upon this one at Target! Just look at that pretty handle on top.
Come along as we learn how to decorate a spring cloche!
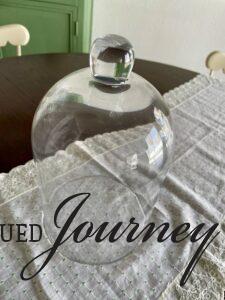
Shop Cloche Domes
Spring Cloche Decor with Pastels and Floral Patterns
So, off I went, brainstorming how to use this cloche with decor pieces that I already had. Now, to preface this post, I will say this first go around at styling a cloche was not easy.
The diameter of the cloche dome is small and I had such a hard time finding items that fit. Let me walk you through my process and share the struggles I had along the way but also the triumph of creating a piece of decor that I just love!
I’ve done the hard work for you. Learn how to style a pretty spring cloche…without the fuss!
Materials Used for DIY Spring Cloche
- glass cloche dome
- a base such as a plate, platter, or wood round
- faux moss
- faux yellow stems
- ceramic bird
- faux bird nest
- cream colored ribbon
Pretty Spring Cloche Ideas with Vintage Decor How-To
Step 1: Choose a Base.
If you have a cloche dome that doesn’t come with a base, you get to choose one! I actually prefer this because you are able to coordinate the base with the theme of the cloche.
Some ideas for a base include vintage plates, wood rounds, or a cake stand.
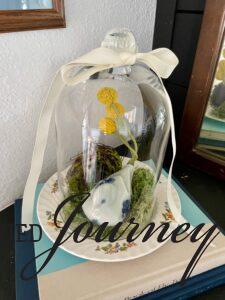
For my base, I chose this vintage floral plate that I thrifted years ago for only .50 cents. It’s the perfect base for my cloche.
The colors on it are exactly what I had pictured in my head!
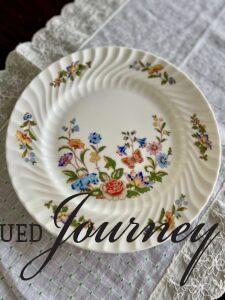
The inspiration for my cloche was a mossy spring forest, full of wildflowers, in the English countryside.
Well, it just so happens that the marking on this plate suggests just that! It was meant to be 🙂
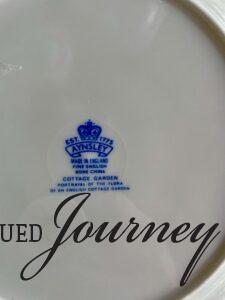
Step 2: Find Items To Fit.
This was a challenge for me because I had to find items that fit not only on the plate itself but also within the diameter of the cloche.
I pulled items out from my Spring decor bin that I thought would work. This thrifted, vintage ceramic bird had to be used. I mean, how cute is it?!
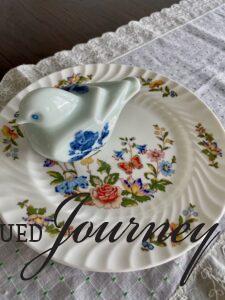
Okay. Here’s where I started to struggle.
I wanted to use taller stems in the back to add height. Initially, I was going to put them in a small milk glass cup, as seen below.
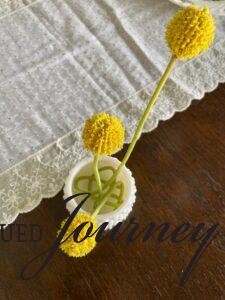
However, this cup wouldn’t fit under the cloche with the bird. I needed something sturdy to hold up the stems so they wouldn’t fall over. I was at a loss because everything I was trying was too big!
Then, as I was rummaging around in my craft drawer, I happened upon a faux bird’s nest that I totally had forgotten about! I used it last spring in my vintage floral door basket.
If this nest worked, it would totally complete the ‘English garden’ look that I was going for.
I tested the nest on the left side to see if it would hold up the stems if they were shoved underneath it.
To my surprise, it worked! Wahoo!
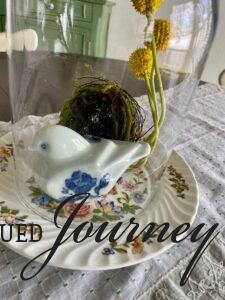
Step 3: Arrange Cloche Items.
Now that I had all of my items, I made sure that they were arranged to my liking.
This proved to be a little difficult for me because 1) I wanted the nest to be on it’s side and it kept wanting to not be, 2) The stems needed to be positioned just so and they weren’t cooperating and 3) It all had to look neat inside the cloche and not jumbled together.
With all that being said, patience really came in handy and in the end, I succeeded in the look I was going for!
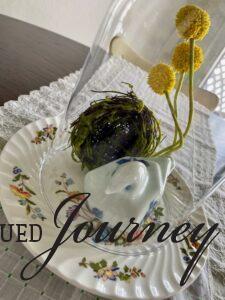
Step 4: Add Moss to the Cloche.
For some texture and to add a bit more of that cottage feel, I decided to add some moss.
I had a whole bag of faux moss leftover from last spring when I made moss balls and it’s just what I needed for my cloche.

Using a tiny bit of moss at a time, I carefully lifted up the cloche, just enough to slide the moss underneath while using only one finger.
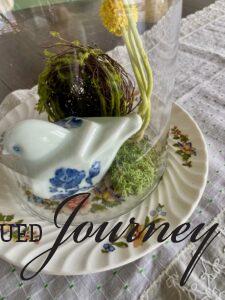
It’s really up to you on the amount of moss you use. I just went with what looked pleasing to my eye and stopped when I felt there was enough moss.
I did use more moss on the right side than on the left, making it look a bit more realistic.
Think of the moss that grows in the forest, like ground cover. It’s not even, so I tried to mimic that.
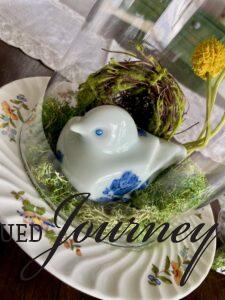
Also, by adding moss to the base, it covered up the ends of the billy ball stems, creating the illusion that the stems are growing right up out of the moss.
That was totally unplanned but I love it!
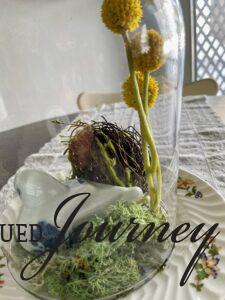
Step 5: Tie a Ribbon Onto the Cloche.
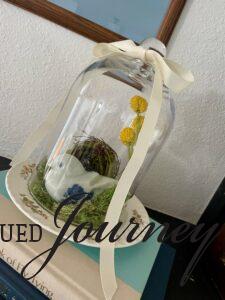
After moving the cloche to the mantel for photos, there was something missing. A split second later, I knew exactly what it needed. Ribbon! I had this cream colored ribbon leftover from my winter decor.
The neutral color of it doesn’t take away from the scene itself. You could also use spring-like colored ribbon such as light pink or sage green.
Doesn’t the ribbon make it feel complete? I purposely left the ribbon long so that it would hang down against the sides of the cloche.
It creates a light and fresh feeling on this spring decor.
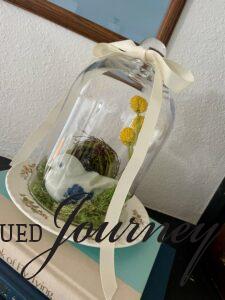
Step 6: Display your Spring Cloche.
Phew! With all of that said and all of the struggles that came with styling my first ever cloche, it’s finished and I just adore it.
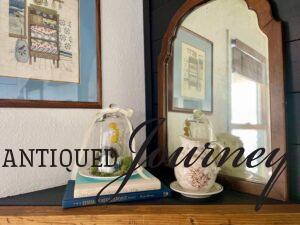
For display, I simply placed a small stack of blue vintage books on the mantel and set the cloche on top.
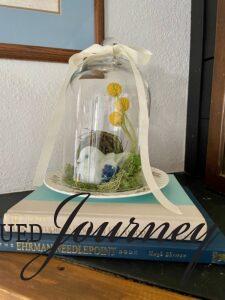
For a small spring vignette, I placed a small ironstone plate next to the books and added one of my favorite ironstone pitchers on top.
In combination with the antique mirror, each piece adds its own unique touch to the mantel, creating a unified spring display that is full of character.
Other areas of a home that you could display a cloche can include:
- an entryway table
- on a bathroom counter
- as a table centerpiece
- styled into a shelf vignette
Closing Tidbits on Pretty Spring Cloche Ideas with Vintage Decor
It is my sincere hope that these ideas on how to decorate a spring cloche are helpful for you! Glass cloche domes are such a fun home decor accessory and can be styled in so many different ways, especially as spring decor.
They enable you to create a little scene inside, which, when finished, is a total expression of your creativity. Be encouraged to try something new, finding meaning and joy along the way.

Let me know in the comments what other items you would like to include in a cloche display. I would love to know!

Just click the red button in the left corner to PIN and save it for later reference.
If you are new here, I’m Rachel, the blogger and content creator here at The Antiqued Journey. I’m so happy to have you! I invite you to stop by the ‘about me’ page to get to know me a little more.
Here on the blog, you will find loads of inspiration for decorating with vintage and antique decor, simple DIY crafts and many thrifting adventures. If that interests you, I invite you to sign up for my e-mail.
Follow Along with The Antiqued Journey
- The Antiqued Journey shop
- Shop exclusive content in my LTK shop
Other Spring Posts to Enjoy

Best Artificial Flowers for Spring




26 Comments. Leave new
Thank you for introducing me to the word “cloche”. Your decorating idea is lovely.
Rachel, how cute is this Spring cloche! I just love how it eventually all came together. That vintage plate is beautiful. This will definitely help you get through the last of your snow days. -meagan
Thank you!!
Great minds indeed. Your cloche looks so pretty all decorated for spring! I love the cute bird and nest. and the ribbon you tied onto your cloche is the perfect finishing touch!
Thanks so much, Jen!!
This looks like such a fun way to celebrate spring, Rachel! I love how you’re not waiting for spring to come outside you’re making the most of the season you have and bringing it inside. I love how you decorated this cloche. The bird and the moss and the sweet flowers are beautiful ways to welcome spring.
Thanks so much for the kind words, CoCo!!
I love how you brought the outdoors in with your beautiful cloche! The bird and nest are the perfect touches for Spring! I can’t imagine still having snow on the ground at this time of year! I hope spring weather comes your way soon!
Thanks so much, Donna! Yea…we have beautiful summer’s and fall time here but the winter’s get SO long. It’s currently 8 degrees….I’m just SO over it!! But, April usually starts to be Spring so, soon enough! Thanks for stopping by the blog, I do appreciate it!
I love how you took us through the steps to creating your spring cloche. Actually a lot of thought and design go into putting one together, even though some might think it’s easy peasy. Your plate and little bird are perfect together! Hope spring gets to you soon, we’ve been super cold and yucky down here in SW Missouri.
Hey Debra!
Thanks so much for your lovely comment! I think EVERYONE is so over this weather!! Wishing Spring for us all 🙂 thanks for coming by today! Hope you have a great weekend!
Rachel – I love how you added moss to the little cloche scene. It really does make it feel like spring. Great idea my friend. Of course, the floral plate was a nice vintage touch !!
Thank you!!
Lovely Rachel! That plate is to die for and the perfect foundation for your cloche vignette. I”m also sooo ready for spring friend! Happy Easter. XO- MaryJo
Thank you! It’s SUCH a beautiful day here today! Happy Easter, friend!!
I love that you used a vintage plate for the base, Rachel! BRILLIANT!
I’d love for you to join us over at the Creative Crafts Linky Party every Wednesday through Sunday
https://creativelybeth.com/team-creative-crafts-linky-party/
Followed and Pinned!
Creatively, Beth
Hi Beth!
Thanks so much! I appreciate that!!
[…] It doesn’t necessarily need to be a tray. It could be a basket, a platter, or even a plate! […]
[…] you have the seashells the way you want, do a test fit with the cloche dome to be sure that everything fits nice and tight under […]
[…] I could find to fill that small area. The faux bird’s nest, which I had just taken out of my cloche, was the winner. It fits perfectly back […]
[…] kept the mantel very simple this season. The left side is adorned with Spring florals and the cloche DIY that I created a few weeks ago. I paired the cloche with a vintage watercolor painting that I found […]
Hi Rachael, so enjoyed your newly decorated spring cloche…I just did an old vintage wire one with a bunny and a bottom basket…love making these.
Hi, Darla!
Thanks so much! The one you made sounds so cute!! They are endlessly fun to create, aren’t they?! Thanks so much for coming by today!
[…] just a few supplies and some easy steps, you can create a stunning centerpiece that will impress your guests and add a touch of Spring to your […]
[…] I could find to fill that small area. The faux bird’s nest, which I had just taken out of my cloche, was the winner. It fits perfectly back […]
[…] in Rachel’s spring inspired cloche. The plate alone makes me smile. Pop over to The Antiqued Journey to see it all. Bring on the spring […]