Last Updated on February 20, 2025 by Rachel
Make a colorful and easy DIY Easter egg topiary that will be the talk of your table!
Spring has arrived and with it comes one of my favorite holidays… Easter! There’s something about the pastel colors and floral decorations that make Easter so special. But beyond that, there’s also the opportunity for some fun and creative DIY projects. And, if you’re looking for a simple yet impactful way to add some Easter charm to your home, look no further than this easy DIY Easter egg topiary!
Elegant Pastels for an Easter Aesthetic
Truth be told, there are a lot of Easter egg craft tutorials online. And recently, there has been an uptick in Easter egg topiary DIY ideas. Honestly, I almost didn’t want to share this because there are just so many other ones to choose from.
But, since I had this DIY on my calendar and already purchased all of the materials, I decided to go for it. So, here we are! I’m glad I did because it turned out so pretty…probably in the top three DIY projects I’ve ever made!
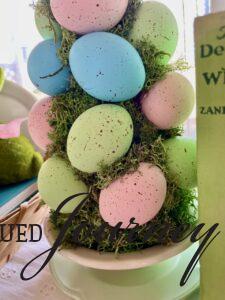
I wanted a colorful yet elegant look to this DIY Easter decor.
Inspired by jadeite green this Spring, you will notice pastel colors really take hold on my DIY Easter egg topiary. I mean…what better way to welcome the Easter season than with fresh and pretty pastels?!
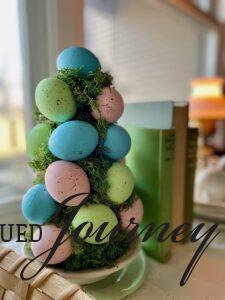
Cheap Easter Decorations and Easy Easter Craft
With just a few supplies and some easy steps, you can create a stunning centerpiece that will impress your guests and add a touch of Spring to your decor.
In this article, we’ll explore the step-by-step process for making your own topiary, along with some tips and tricks to help you along the way. So, grab your crafting supplies and let’s get creative!
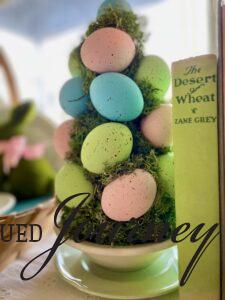
Materials Needed for an Easy DIY Easter Egg Topiary
- 24 white plastic eggs
- 9×4 foam cone
- reindeer moss
- craft paint in light pink, light blue, light green and brown
- toothpicks
- floral foam blocks
- hot glue gun
- craft paintbrushes
- shallow bowl, compote or dish
- *Optional: Drill and 1/16 drill bit*
Shop Egg Topiarys
How to Make an Easy DIY Easter Egg Topiary
Let’s get into the tutorial for creating this easy DIY Easter egg topiary. As always, the steps below are meant to be a guide. There aren’t any rules when it comes to DIY decor so feel free to tweak things as you see fit!
Step 1: Prepare Eggs for Painting.
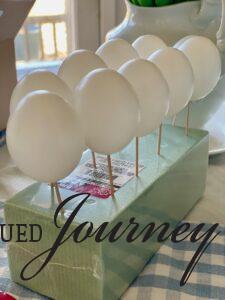
The first thing to do is prepare the plastic eggs for painting. I found that the easiest way to do this is stick each egg in floral foam using toothpicks. This helps you be able to coat the egg with paint without holding on to it and making a slippery mess all over your fingers!
Tip: If the holes in your plastic eggs are a tad too small, you can use a drill and a 1/16 inch drill bit to make each hole a tiny bit bigger…just large enough to stick the end of a toothpick in it.
I didn’t get a photo of this step but here you can see what they look like.
Step 2: Paint All of the Easter Eggs.
I chose to use three different pastel colors for my eggs. The pretty light blue is the color I started with.
Squeeze a small amount of paint onto a plate and then use a paintbrush to apply the paint to the eggs.
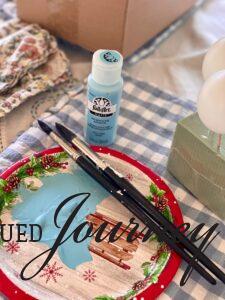
This is where the eggs poked into the foam comes in really handy because all you need to do is rotate the foam to reach all of the egg sides!
Easter Egg Painting Tip: I needed to apply two-three coats of paint to achieve the look I was going for.

While letting the blue eggs dry, I moved on to painting my pink set.
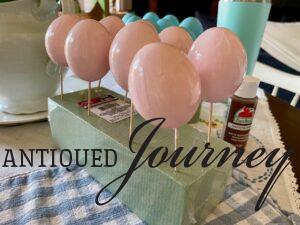
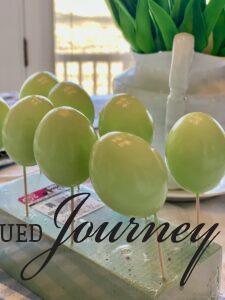
And again, while the pink eggs were drying, I started painting the green eggs.
You will get into a nice rhythm of which eggs are dry enough to paint a second coat on while others are drying.
Easter Egg Painting Tip: I painted 8 eggs of each color, so 8 green, 8 pink, and 8 blue, painting a total of 24 eggs.
Step 3: Flick the Eggs with Brown Paint.
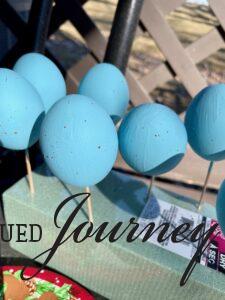
I wanted my eggs to have some more depth to them rather than just flat paint. So, to make the eggs look a bit more realistic, I watered down some brown craft paint. This will allow you to create specks on the eggs by flicking the watery paint! Super fun, I must say 🙂
Squeeze some brown craft paint onto a paper plate and then add a small amount of water at a time. Keep adding water until you have runny paint!

Then, I took my first set of dry eggs outside.
I stuck the paintbrush into the brown paint. Then, I flicked the paintbrush with my finger to create small brown specks.
Rotate the floral foam block so that you are getting the specks all the way around each egg. Egg Painting Tip: Vary the thickness of the specks for a more realistic look. This is achieved by adding more or less paint to the paintbrush.
Use this same process for the other colors of eggs!
Step 4: Fit Floral Foam Cone.
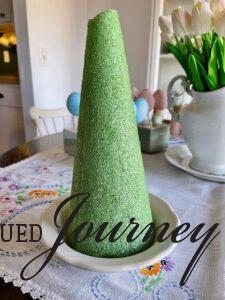
While your specks are drying, it’s a good time to fit the foam cone in your dish of choice.
My tip is to use a shallow bowl or dish that the cone fits snuggly in. You want the bottom of the foam cone to sit just below the rim of the dish but low enough so that it won’t tip over.
I chose to use a restaurant-ware bowl that I found thrifting. It’s the perfect neutral color and the scalloped rim adds such a feminine touch!
Here are some other dish options:
Step 5: Assemble Easter Egg Topiary.
Once all of the eggs are dry, you can start assembling the topiary!
There is no right or wrong way to do this step but I made sure, as best I could, to evenly space out the colors.
Using a hot glue gun, squeeze a large circle of glue onto an egg and HOLD IT TIGHTLY for at least 30 seconds. I didn’t do that on some of them and they fell right off!

Continue to fill the foam cone with eggs until you can’t fit any more on it.
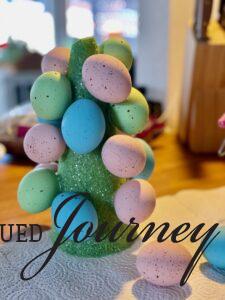
I hummed and hawed about gluing one egg to the very top of the cone.
But in the end, I did, and am very happy about it. That one egg at the top finishes off the topiary, giving it the tree shape that it needed.
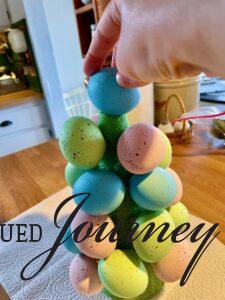
Tip: Leave about one inch of clearance around the base of the egg. Meaning, don’t glue any eggs below that ‘inch’ line. This will ensure that the topiary will sit flat in the dish.
Step 6: Fill in With Moss.
The last step is to fill in all of those gaps, where the foam is showing, with green moss.
To do this, you will want to go one small area at a time.
I squeezed a good amount of hot glue into the gap and then pressed a small chunk of moss on it.
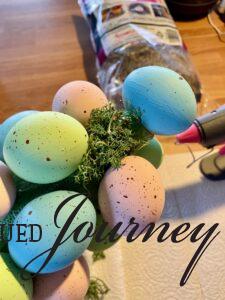
Continue this process until you have every inch of foam covered with moss.
Then, once you have one layer of moss done, you can go back and do another layer to fill out the topiary more.
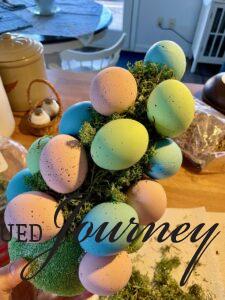
As stated above, the inch clearance at the base of the cone allows you to completely cover the bottom in moss.
So, when you get to the bottom, add about three layers of moss so that it looks like the topiary is growing out of the bowl itself.
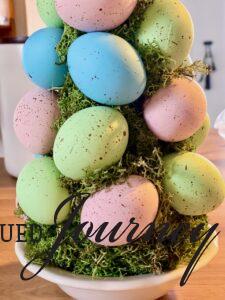
As you can see, I liked the look of some moss hanging off the topiary and covering a bit of some eggs.
This creates a more natural look.
But, that being said, if you like a cleaner, more refined look, do that! It’s all up to you.
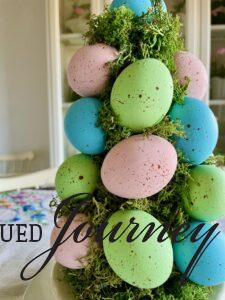
High-End Statement Centerpiece DIY for Easter
And with that, we have a fabulous Easter topiary!
Isn’t it a beauty?!
Paired with some bunnies, birds, or vintage dishes, the topiary tree would make such a beautiful table centerpiece for your Easter celebration.
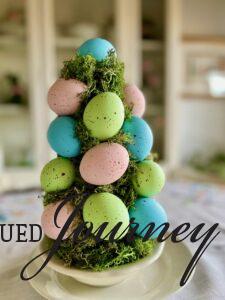
Other places you could display your Easter egg topiary include:
- a hutch
- side table
- coffee table
- on a credenza
- entryway table
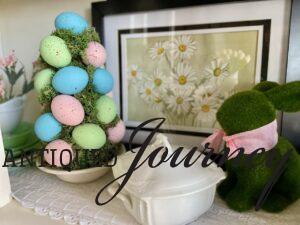
For a simple Easter vignette, try pairing the topiary with:
- moss bunnies
- vintage dishes
- white table runner
- floral art
- vintage green books
- milk glass
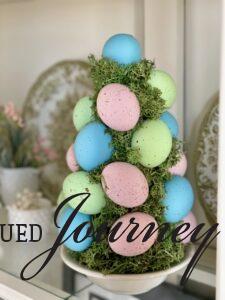
Closing Tidbits for an Easy DIY Easter Egg Topiary
I hope you are inspired to create an easy DIY Easter egg topiary for your home this season! It truly doesn’t take much to craft a unique, one-of-a-kind decor piece that will add joy to any Spring celebration. And, how rewarding it is to tell people “I made that!”
Easter is a beautiful time of hope and renewal. Be encouraged to find the space to renew your heart and mind as you welcome this new season.
Wishing you a blessed Easter!

Leave me a comment! Would you like to make this for your Easter celebration? I love hearing from you!

PIN it to remember it!

If you are new here, I’m Rachel, the writer and content creator here at The Antiqued Journey. I’m so happy to have you! I encourage you to stop by the ‘about me’ page to get to know me a little more.
Here on the blog, you will find loads of inspiration for decorating with vintage and antique decor, simple DIY crafts and many thrifting adventures. If that interests you, I invite you to sign up for my e-mail. You will receive a free digital download as a thank you!
Follow Along with The Antiqued Journey
- The Antiqued Journey shop
- Browse my LTK shop!







20 Comments. Leave new
Well, that’s just the cutest topiary for spring Rachel! I’m sharing this project with my readers this weekend! Happy spring! Pinned ☺️
Hey, Cindy!
Thanks so much! Appreciate it. Hope you are well!
Rachel- I love that you painted the eggs and added the brown flecks. They turned out so good!! Have a wonderful weekend my friend.
Thank you! You, as well!
Well, how darn cute is this? I love your Easter egg topiary, Rachel. The pastel colors are so pretty. A perfect Easter DIY!
Hi!
Thanks so much, Jen!
Rachel this is SO cute, what a great tutorial friend! Hugs xx Tanya @twelveOeight
Hi!
Thanks so much!!
Love, love, love the way this came together, Rachel! I’ve always wanted to make one but they looked too involved to even bother so I definitely appreciate your step by step guide and tips and tricks. I can’t wait to try this now too. The colors you chose feel like the perfect celebration of Spring! Hugs, CoCo
Thanks so much! I know…I thought the same but when I was putting the steps together in my head, it didn’t seem as involved as I thought. Happy Spring, friend!
Hi Rachel! I love this topiary, and it looks fabulous in your thrifted bowl! The colors you chose are perfect for spring, and it’s so cute with the moss bunny! Happy Spring!
Hello!
Thanks so much, Donna! This was fun 🙂 Happy Spring!
[…] DIY Easter Egg Topiary […]
Well this is just the cutest thing I’ve seen. I love your Easter topiary Rachel. It’s just lovely and the perfect decoration for the holiday.
Thanks so much, Wendy! Happy Easter!
[…] can make decor for each season and use it year after year. Or, alter it to make it match the season, getting more use out of […]
BRILLIANT tutorial Rachel!
Don’t forget to join us over at the Creatively Crafty Linky Party every Wednesday through Sunday
https://creativelybeth.com/creative-crafts-linky-party-2/
Pinned!
Creatively, Beth
Hi, Beth!
Thanks very much!
This is so beautiful and love the speckled eggs, well done.
Saw your awesome post at Country Road 407: Farm House Friday
My entries this week 55+56
Please share with SSPS: https://esmesalon.com/tag/seniorsalonpitstop/
Thanks so much!