Last Updated on July 10, 2025 by Rachel
Budget-friendly fall crafting at its finest. Learn how to easily make a DIY fall garland with waxed leaves!
This simple yet stunning handmade decor brings the beauty of the outdoors inside. With just a few materials and steps, you can create a unique and personalized piece of decor. Whether you’re a seasoned DIYer or just looking for a fun project, I’ll guide you, step by step, on creating a DIY fall garland with waxed leaves. Embrace all things cozy and learn how to transform ordinary leaves into a beautifully rustic autumn adornment!
Fall Decor: Garland Magic with Fall Leaves
I will preface this tutorial by telling you that you will need to go outside and collect fresh leaves. I took my dog for a nice fall walk in the woods the day before I made this and just kept the leaves in a tightly sealed Ziploc bag overnight so they wouldn’t dry out.
You guys, this is one of the coolest projects that I’ve ever seen! The wax on the leaves makes them feel super whimsical. Once the wax melted, I was able to create my garland in 30 minutes flat.
You can find many of the materials at the thrift store or dollar store, making this DIY very affordable. All in, I spent around $9 on supplies for this. I think you are really going to love this one, so let’s get into it!

Gather Your Supplies: Fall Garland Essentials
- fresh leaves in fall colors
- lace ribbon
- paraffin wax
- small crockpot OR small pot and stove
- plastic spoon
- wax paper or tin foil
- scissors
How to Make a DIY Fall Garland With Waxed Leaves
Step 1: Melt The Wax.
I found this miniature crockpot at my local thrift store for $4.00. It’s perfect to use for the many crafts I have going on around here this time of year.
I plugged it in, placed one bar of Gulf Wax in it and put the lid on. I will say that it took my wax around 45 minutes to fully melt. So, start melting your wax earlier rather than later.
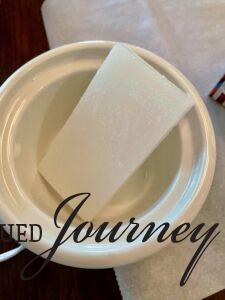
Depending on your crockpot or stove, your wax may melt quicker than mine. Basically, I just let it melt and stirred it once in a while using a plastic spoon.
You can prepare your other materials while you are waiting. I laid out wax paper on my table, organized my leaves, and gathered the other supplies. Once the wax is melted, you can move on to the next step!
Step 2: Dip Your Leaves In Wax.
Grab one leaf and dip it in the wax.
Smoosh it around in there really well to make sure the leaf is fully coated with wax.
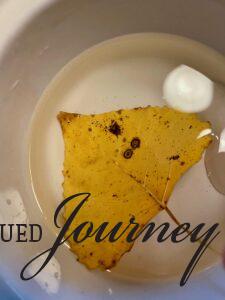
I was a little worried that my large Maple leaves wouldn’t fit in the little pot but no fear!
Since the fresh leaves are pliable and soft, I just moved it around in the wax, turning it often to coat all the sides of it.

Once the leaf is coated, shake any excess wax off over the crockpot. Then, place it on wax paper to dry.
Repeat this same process until you have enough leaves to use for a garland. I waxed around 30 leaves.
Step 3: Let Leaves Dry.
This wax dries SO fast. Like, within thirty seconds, the leaves are fully dry.
Tip: As you are dipping leaves and moving them to the wax paper, try not to drip that wax on any dried ones. I had to throw out a few of my waxed leaves because they got so many drips on them that they were just too spotted and over-waxed!

The leaves look so neat with wax on them! They feel so soft and smooth.
Tip: You might see some dried wax coming off over the tips of the leaves and that’s totally okay. Just slowly pull the excess off with your fingers.

Step 4: Assemble the Garland.
Next, you will start to build the garland.
I cut a piece of thin ribbon that was roughly 3 feet long. You can make yours longer or shorter depending on your space.

Leave some room at the starting end to be able to attach or tie it to whatever you are going to be hanging your garland from.
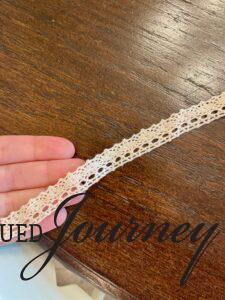
You can build your garland in any way that you like. I chose to do a pattern of two Maple leaves to one Aspen leaf.
However you choose, start by tying one leaf on and knotting it at the top.
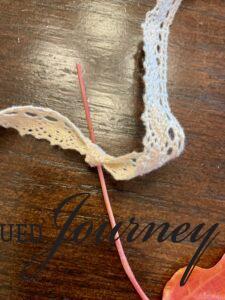
It’s easier to tie a knot right in the middle of the stem first and then slide the knot up or down according to your preference.
Continue this process, spacing out the leaves in a way that looks pleasing to you.
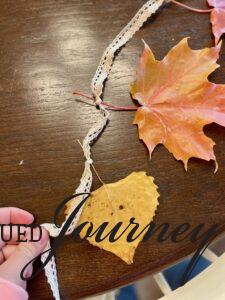
Leave a few inches of ribbon at the end like you did on the other side to be able to attach it. All in all, I was able to fit about 11 leaves on my ribbon. This number may differ for you depending on the size of your leaves and how long you want your garland to be.
You can make it 6 feet if you want, which would enable you to use closer to 30 leaves.

Fall Garland Ideas for Display
I had an open spot on my milk glass shelf to hang my garland from.
The colors of the fall leaves pop beautifully against the white glass!

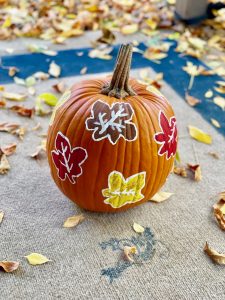
I had some extra leaves leftover after my garland was finished. They are too pretty to throw away so I stuck a few in the wreath that hangs on my front door.
The leaves coordinate so nicely with the plaid. It really adds a beautiful touch of the harvest season to this wreath and is so welcoming!

Another idea is to stick some leaves into a vintage vessel for a pretty centerpiece.
Using the remaining leaves, I tucked them into my small copper watering can and set that on top of a vintage cheese box. The different textures paired with the deep, moody colors is just stunning!

Closing Tidbits on DIY Fall Garland with Waxed Leaves
I truly hope that this fall garland tutorial is something that you will want to create for your home! You can literally do anything with these leaves by preserving them in wax. The possibilities are endless!
Find joy in creating this autumn season and be encouraged to create a cozy home, full of hope and life.

Let me know in the comments how this craft turns out for you and where you display it!

Just click on the red button in the left corner.

If you are new here, I’m Rachel, the writer and content creator here at The Antiqued Journey. I’m so happy to have you! I encourage you to stop by the ‘about me’ page to get to know me a little more.
Here on the blog, you will find loads of inspiration for decorating with vintage and antique decor, simple DIY crafts and many thrifting adventures. If that interests you, I invite you to sign up for my e-mail. You will receive a free digital download as a thank you!
Follow Along with The Antiqued Journey
- The Antiqued Journey shop
- Browse exclusive content in my LTK Shop






53 Comments. Leave new
Rachel, what a great idea! Thanks for the easy tutorial and most of all, thanks for sharing!!
Hello!
Thanks SO much!! I’m so happy that you enjoyed it and that it was easy for you to follow. Thank you for coming by the blog today…I do appreciate it!
Rachel! I love this. I’ve always wanted to preserve leaves but been a bit intimidated by the process. You make this so simple. Thanks for the inspiration friend! It looks so pretty. XO- MaryJo
Thanks, MaryJo!! It’s SO easy and is actually really calming 🙂 Thanks so much for stopping by today!!
I had no idea you could wax fall leaves like this Rachel, that is so cool! I’m always bummed when we have to leave behind all the pretty fall leaves we collect at the cabin but I’m so excited we don’t have to do that now. I’ll definitely be bringing a bag along this year so we can use this idea. Thanks so much! Hugs, CoCo
Isn’t that so neat?! I thought it was too cool not to share!! It’s so much fun and is actually a super calming craft 🙂 Thanks so much for reading today…I’m so happy that you found this to be useful!! Hugs!
This is such a smart idea, Rachel. The leaves are beautiful. And I love how you wove some into your wreath too! I’m adding this project to my “must-try” list.
Hi Jen!
Thanks so much!! It’s so much fun…I’m sure you’re girls would love it!! Thanks so much for stopping by today, I appreciate it!!
Your waxed leaves are so pretty, Rachel. And it looks like a fun uncomplicated DIY. We used to be able to buy waxed leaves at Hobby Lobby and Michaels, that was before all the wonderful silk faux ones that are available now. Nature makes the loveliest decor.
Thanks, Debra!!
Nature’s decor is the best because it’s all natural and free!! Thanks for stopping by the blog…happy weekend!!
Hi Rachel! I love learning new things and I had no idea you could do this to leaves! I love the shine it adds to the outside of the leaf! Your garland is adorable and I like the idea of adding them to a wreath! Thanks for the lesson and inspiration! Blessings, Donna
Hi Donna!
Oh yay!! You are so welcome! I’m so happy you learned something new…it really is so much fun to make this! Thanks so much for reading today. Happy weekend!!
This is such a great idea! I didn’t know you could wax leaves & we have a whole yard of pretty leaves! Thanks for the great tip!
Hi!
Thank you!! It’s so much fun..actually very calming!! Thanks for reading, Lora!
Rachel! This is such a creative idea and I LOVE it! You could use these leaves for so many purposes – such as gift toppers or to make a wreath. Thank you for sharing this idea with us. I am inspired!
Yay! thank you! The sky is the limit with these leaves. Gift toppers are such a great idea!!
What a wondeful way to preserve the beauty of autumn leaves! Lovely! Smiles, Linda at Paper Seedlings
Thanks so much, Linda!!!
Rachel this is amazing! So creative and budget friendly. I love how they look with the wax on them. What a great Fall diy.
Thank you!!! It was so fun to make!
Wow! These came out great! I never realized that you can wax leaves. Such a great craft! Thank you for sharing your post at Tuesday Turn About!
Thanks so much, Lynne!! It’s super fun and very relaxing!!
I cannot get enough of the vibrant fall leaves so this is super exciting to see! Thank you for sharing them with us on Farmhouse Friday. Featuring it tomorrow! pinned
Hi Cindy!
Thanks so much!! I appreciate that!!
[…] at The Antiqued Journey had a sweet leaf DIY that was simple and […]
[…] at The Antiqued Journey had a sweet leaf DIY that was simple and […]
[…] DIY Fall Garland With Waxed Leaves Eco-Friendly Cleaning With Tru […]
BRILLIANT idea Rachel! We will be featuring you starting Wednesday at the Creative Crafts Linky Party!
Creatively, Beth
Thank you!!!!
[…] DIY Leave Garland with Waxed Leaves / Eco-Friendly Cleaning With Tru Earth […]
[…] is such a fun project! Rachel from The Antiqued Journey shared her DIY Fall Garland With Waxed Leaves. I love the idea of preserving the natural beauty of fall leaves in wax. Once you wax the leaves, […]
Rachel, this is such a great post for preserving the natural beauty of fall leaves in wax. I am so excited to feature your post at this week’s Tuesday Turn About link party. Thank you so much for sharing!
Thanks so much, Lynne! I appreciate it!!
This is such a wonderful idea! The leaves are so beautiful and what a great way to preserve and use them. I’ll be featuring it tomorrow at Thursday Favorite Things!
Hi Pam!
Thanks so much!! I appreciate it!
[…] at The Antiqued Journey had a sweet leaf DIY that was simple and […]
[…] DIY Fall Garland with Waxed Leaves […]
[…] DIY Fall Garland With Waxed Leaves […]
Hi Rachel – Just wanted to stop by again and let you know how much I loved this post. One of the things I love the most about living in upstate NY is the color of the leaves during the month of October. This is such a fun way to make them last a bit longer. Have a fabulous week.
Thanks!! Yes..the leaves are just starting to turn to brilliant colors and it’s so pretty!!
I’ve never seen leaves dipped in wax like that, they look fantastic! I have to give this a try 🙂
Thanks!! It’s Super easy and SO fun!
I’m so glad you linked this waxed leaf garland for several weeks at Tuesday Turn About! I’m happy to be featuring your post at this week’s party. Pinned!
Hey Julie!
Thanks so much!!
[…] DIY Fall Garland With Waxed Leaves […]
[…] Fall Leaf Garland: By The Antiqued Journey […]
[…] Fall leaf garland with waxed leaves by The Antiqued Journey […]
[…] Fall Leaf Garland DIY […]
[…] Waxed Leaf Garland DIY […]
[…] Waxed Fall Leaf Garland […]
[…] I will be using this plate for Thanksgiving as well but I will also use it year round for decor purposes. These types of Ironstone pieces are amazing to use in vignettes and on shelving because they are a neutral color. I can add it to the back of a basket or use it as a base to build a small display on. For now, it is being used for a simple fall display and is holding some of my pretty waxed leaves! […]
[…] Fall Hutch Decorating Ideas DIY Fall Garland With Waxed Leaves […]
[…] source (responsibly) from nature! Try wildflowers in the spring, pinecones in the winter, and a dried leaf garland in the […]