Last Updated on November 6, 2021 by Rachel Granholm
This project is a fun one! I want to share with you how to create a DIY leaf stenciled pumpkin for fall!

This pumpkin craft is simple and low-key. It is a great project to create if you are tight on time and need something quick or if you are just looking to add some color and botanical whimsy to your fall display. I was inspired to create this project by an idea that I saw in a magazine a few weeks ago. I hope this DIY leaf stenciled pumpkin inspires you to create something fun for your home as well!
This post contains affiliate links. That simply means I earn a small commission on any linked products at no extra cost to you. As an Amazon Associate, I earn from qualifying purchases.
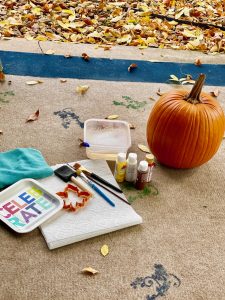
Materials Needed
- 1 medium size pumpkin
- craft paint (red, yellow, brown, white)
- craft paintbrushes in various sizes
- paper plates
- a rag
- warm, soapy water
- paper towels
- a leaf shaped cookie cutter
- white paint pen (optional)
Directions for a DIY Leaf Stenciled Pumpkin
- Wash off the pumpkin.
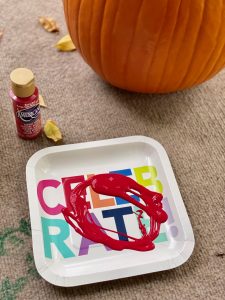
Using a rag and warm, soapy water, wipe off the pumpkin. Make sure you try and get most of the dirt off of it or the paint won’t stick properly. Let the pumpkin air dry for a few minutes. - Pick one paint color to start.

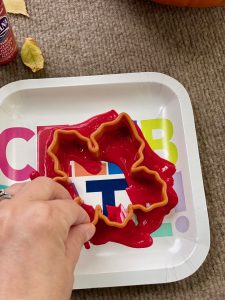
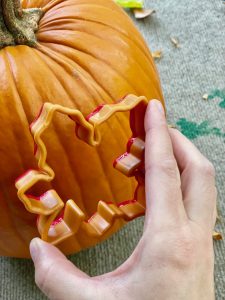
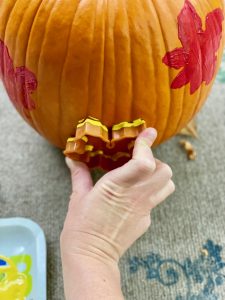
Using a paper plate, squeeze a good amount of paint onto it. Take your leaf cutter and move the paint around with it so that the bottom of the cutter is covered in paint.
- Stamp the leaf onto the pumpkin.
Press very firmly and get as many of the edges down as possible. A pumpkin is obviously not flat so you will have some areas around the edge that don’t show up.
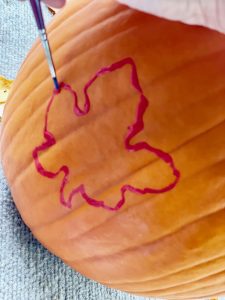
To fix this, simply use a small craft paintbrush and finish painting the edges.
- Then, fill the inside of the leaf with paint.
Use a slightly thicker paintbrush and fill in the middle of the leaf. You can add some texture too if you would like by simply feathering the paint with the brush. See the picture below for reference.
- Continue this process.
Using the other colors of paint, continue the above process until you have a pattern on your pumpkin that is pleasing to you. Tip: I went color by color and did all the red leaves, washed the cutter, then did all the yellow leaves, washed the cutter, then all the brown leaves.
- Allow the stencils to dry completely for about an hour.
- Outline the leaf borders with white paint.
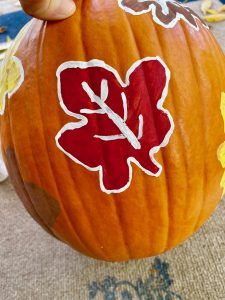
Using either a pointed paintbrush or a white paint pen, you are going to outline each leaf with paint. This helps to make the leaves stand out more on the orange pumpkin as well as cleans up the edges of the leaf stencils.
Continue this process until you have all the edges outlined with white. Please remember that no part of this project needs to be perfect. When working with organic and natural products, like a pumpkin, it’s okay to let your project be imperfect. Nature is never perfect yet it is still so beautiful. - Add veins to the leaves.
Using the same paint brush or paint pen, paint some leaf veins through the middle of each leaf. Again, just let creativity lead this step and don’t worry about perfection. Let the paint dry completely for about a half hour.
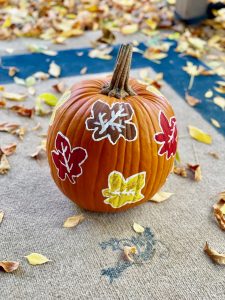
- Display your pumpkin!
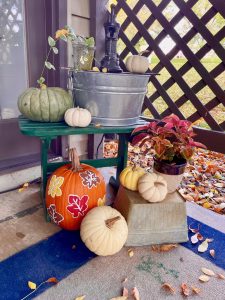
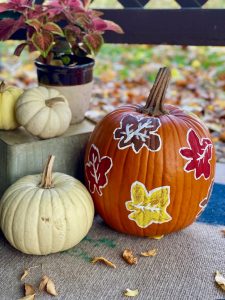
Your cute pumpkin will look so welcoming on your front porch. Display it with some small white pumpkins and a fall plant such as a mum!
 Press very firmly and get as many of the edges down as possible. A pumpkin is obviously not flat so you will have some areas around the edge that don’t show up.
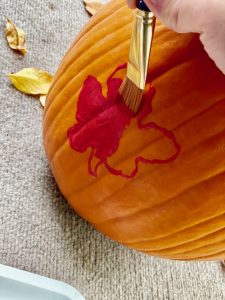 Use a slightly thicker paintbrush and fill in the middle of the leaf. You can add some texture too if you would like by simply feathering the paint with the brush. See the picture below for reference.
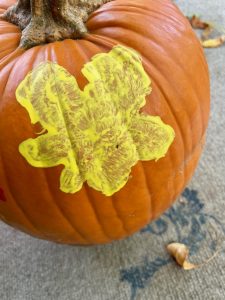


 Your cute pumpkin will look so welcoming on your front porch. Display it with some small white pumpkins and a fall plant such as a mum!
My hope is that this DIY leaf stenciled pumpkin will encourage you to create a simple outdoor fall display for your home. Nature provides a bountiful and beautiful scene, especially during the fall season. Be inspired by the beauty of nature!

Find more simple DIY projects for your home.
Seek out inspiration for your home!


5 Comments. Leave new
Love this project! I am going to do this this week-end!
Hi Rachel! I am not sure how I missed this post. What a fabulous idea. It’s a perfect way to decorate pumpkins with kids. Happy Fall!
Thanks!! This is an older post that I made last fall! Cookie cutters are one of those things that you can use for so many different projects!
[…] DIY Leaf Stenciled Pumpkin […]
[…] DIY Leaf Stenciled Pumpkin […]