Posts on theantiquedjourney.com may contain affiliate links. As an Amazon Associate, I earn on qualifying purchases. You can read the full privacy policy and disclosures here.
DIY Christmas Decor: How To Make A Wood Round and Bead Garland
By Rachel
|
Share this post. Share the Journey!
Last Updated on October 10, 2025 by Rachel
Craft easy DIY Christmas decor! Learn how to make a wood round and bead garland for any space.
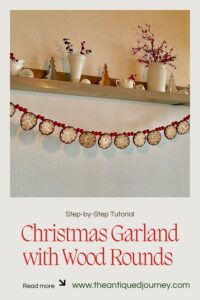
When decorating my home for Christmas this year I was looking for a garland that wasn’t a traditional green garland. I wanted something a little more rustic with a Scandinavian type feel to it. Knowing that something like that in the store would be pretty expensive, I decided to make my own. The end result of my DIY Christmas decor turned out stunning. Learn how to make a wood round and bead garland for your own home this holiday season!

Materials Needed for a Wooden Holiday Garland DIY
- a pack of wood rounds
- red wooden beads
- twine (the pack linked above comes with twine)
- Scotch tape
- scissors
- letter stencils
- craft paint in white, red, and green
- small craft paintbrushes
- a toothpick
- paper plate
- a pencil
- a work surface cover such as tin foil or an old towel
- a drill (optional)

DIY Christmas Decor: How To Make A Wood Round and Bead Garland
1. Cover Your Work Surface.
I used foil under the wood rounds in case any white paint spilled but you could use an old sheet or towel just as well.
2. Decide What You Want the Garland to Say.
I went with ‘Merry Christmas’ but there are many other sayings you could do such as ‘Happy Holidays’, ‘Peace’, or ‘Noel’. Lay out as many rounds as you need to spell the word(s).
Tip: These rounds are linked above and they come with an eyelet screw on top for hanging. Be sure that each of the wood rounds are straight up and down before you start, meaning the eyelet is on top.

3. Place Each Letter Stencil on Each Round.
Then, trace the inside of each letter with a pencil.
The letters might look something like this when you are finished tracing.

4. Prepare the White Paint.
Squeeze some white paint onto a paper plate.
5. Then, Using a Skinny Paintbrush, Start Filling in Each Letter.
Continue painting in each letter. After the first coat dries you can decide if you want to do another coat. I opted to do 2 layers of white paint for a crisp and clean look.
Let the wood rounds dry completely before continuing.

6. Paint a Border Around Each Wood Round. (optional)
I decided to create red berries around each piece of wood. To do this, simply dip the round end of a paintbrush in red craft paint and press onto the wood.
Space out the dots evenly around the wood round.

Then, go back and press two more dots next to each single dot to create bunches of berries.

Continue this process until you have completed berry bunches going around each wood round.
Let the red paint dry completely before continuing.

7. Add Some Green to the Berries.
I used a toothpick to do this step because I just wanted a hint of green coming out from the berry bunches. This step is really up to you on how little or how much green you would like.
I just picked 3 berry bunches on each wood round and did little swipes of green paint with the toothpick.

Keep this step super simple and don’t overthink it!
Once you have the green where you want it on each round, let them dry completely before moving on.
This next part is optional. After my rounds had dried, I started stringing them onto twine with the beads. But, I realized that the letters were hanging sideways and I couldn’t even see the words. So, I busted out my drill!
Follow the next steps for this process otherwise jump down to step 9 and see how to string the beads and rounds to finish the garland.

8. Using a small drill bit (one that just fits the twine through the hole), drill two holes near the top, about 1/4 inch apart.
Tip: Use a spare wood round and do a few test holes. I had to try 3 different sizes of drill bits before finding the correct size.

I found it helpful to drill on either side of the top berry bunch.
Continue this process until you have 2 holes in each wood round.

9. For Assembling, Lay Out the Wood Rounds in a Straight Line.
I laid out my ‘Merry Christmas’ in a straight line on a flat surface.
Then, I placed the wood beads in between each letter.
I did 3 beads, then 2 beads, then 3 beads, etc…for a unique pattern.

10. Measure Out the Twine.
Simply lay out the twine as long as the line of wood rounds and beads is plus 2 inches extra on each end.
You can always trim it later on if it is too long.
11. Knot One End.
String one bead onto the left end.
Knot the twine 3 times behind that bead.

Then you can start stringing the beads and wood rounds onto the twine to assemble the garland.

If you drilled holes in each wood round, for each one simply go up through the left and down through the right with the twine.

If you didn’t drill holes, just string the twine through the eyelets on each wood round.

Continue this process until you have each piece on the twine.

Display your Rustic DIY Christmas Garland
You can hang this garland from a shelf, in a doorway, or on a Christmas tree.
It would also look pretty laying flat on a buffet or a credenza as part of a Christmas vignette.
However you decide to display it, I hope it brings you a little joy each time you see it.

Closing Tidbits on DIY Christmas Decor: How To Make A Wood Round and Bead Garland
This tutorial for how to make a wood round and bead garland was so much fun to create. It brings me such enjoyment when a project that’s in my head comes out better than what I had envisioned!
This season, don’t let the lack of time or perfection stop you from creating something for your home. You can make beautiful things.

 PIN it to save it for later!
If you are new here, I’m Rachel, the writer and content creator here at The Antiqued Journey. I’m so happy to have you! I encourage you to stop by the ‘about me’ page to get to know me a little more.
Here on the blog, you will find loads of inspiration for decorating with vintage and antique decor, simple DIY crafts and many thrifting adventures. If that interests you, I invite you to sign up for my e-mail. You will receive a free digital download as a thank you!
Follow Along with The Antiqued Journey
- The Antiqued Journey shop
- Browse curated finds in my LTK shop
Other Christmas Posts to Enjoy

Christmas Garland with Sheet Music


Feeling a little unsure where to start with vintage decor?
I created Found and Favored, a beginner-friendly guide that walks you through what to look for, how to spot quality pieces, and how to style vintage finds with confidence — without overspending or feeling overwhelmed.

Hey! I’m Rachel!
I’m so glad you are here! Old things are my jam. Antique malls and thrift stores are my happy places.
Here on the blog I love to share my excitement, knowledge, and ideas about all things antique, vintage, and thrifted. Let’s journey together!
Want to style vintage decor with confidence?
Get the beginner’s guide that will save you money and help you find real treasures.

Sign me up for the
Journey!
Sign up for free antique and vintage inspiration, DIY projects, and thrifting tips straight to your inbox.
8 Comments. Leave new
This is such a sweet idea! I’m excited just watching you make this project. Great idea!
I love the Scandi vibe of your wood slice garland Rachel- so pretty!
Thanks, Marie!!
Rachel this is such a cute idea! I’d love for you to come share it at my weekly link party for a chance to be featured! https://www.ourtinynest.com/2022/11/30/weekly-wednesday-link-party-324/
Thank you, Nicolle!!
Such a rustic and Christmas-y project, Rachel! So happy to be featuring your post at Tuesday Turn About this week!
Thanks so much, Julie! I’m so grateful.
[…] DIY Wood Round and Bead Garland […]